Showing posts with label Poultry. Show all posts

Wednesday, August 31, 2011

Slow Cooker Tex Mex Pulled Chicken

    This is the chicken recipe I use pretty much every time I make Mexican. Whether it be Nachos, Burritos, Tacos, Empanadas or Chimi Changas, this Tex-Mex Pulled Chicken will work well.
    Since this recipe creates a fairly large batch, I like to portion the leftovers and freeze it for later use. This way you can make the most delicious Chicken Nachos pretty much on demand.
   
     
Slow Cooker Tex-Mex Pulled Chicken:


Ingredients:

3 whole ancho chilies
3 whole pasilla chilies
4 cloves garlic, unpeeled
2-3 chilies in adobo
1 small red onion, chopped
3 Tbsp. extra virgin olive oil
2 Tbsp. honey
1 Tbsp. cider vinegar
kosher salt
2 tsps. dried oregano
3 3/4 cup chicken stock or low sodium chicken broth
8 chicken thighs, legs removed and skin off
freshly ground pepper
2 bay leaves
1 cinnamon stick

Directions:

(1) Place the ancho and pasilla chilies, as well as the garlic into a microwave safe bowl.
(2) Microwave on high until soft and pliable. About 45 seconds.
(3) Stem and seed the chilies. Peel the garlic.

Right: Ancho Chili  Left: Pasilla Chili

Slice the chili down the center exposing
the inside. Using the blade of your knife,
scrape out the seeds and veins.
(4) Break down the chilies into smaller. Place the chilies and the garlic into a large food processor or a blender.
(5) Add the chipotles in adobo, onion, 2 Tbsps. of olive oil, honey, cider vinegar, 1 Tbsp. salt, and the oregano to the blender. Purée until smooth.

Chipolte in Adobo.
Before...
After
(6) Heat the remaining Tbsp. of oil in a large skillet over high heat. Add the chili sauce and fry, stirring until thick and fragrant (about 5 minutes).

Before...

After
(7) Heat the chicken stock in a microwave until warm.
(8) Pour the stock into the skillet, stir to combine. Simmer until slightly reduced and thickened (about 20 minutes).


(9) Arrange the chicken thighs into the bottom of your slow cooker. Season with salt and pepper.
(10) Add the bay leaves and the cinnamon sticks.

(11) Slowly add the chili sauce. Cover and cook on low for 8-10 hours.

Before...

After
(12) Once the chicken is cooked, transfer to a large dish using a slotted spoon.
(13) Remove the bones, bay leaves and cinnamon stick. Reserve half of the braising liquid (by doing this you can use the leftover liquid for cooking rice, or adding moisture back to the chicken if it seems to dry) and strain through a fine sieve. Discard remnants.
14) Using two forks, pull the chicken apart.


*I have used a 4 Lbs. pork shoulder with this recipe as well, and had great success.

Saturday, August 27, 2011

Back to School Lunch Ideas: Part II

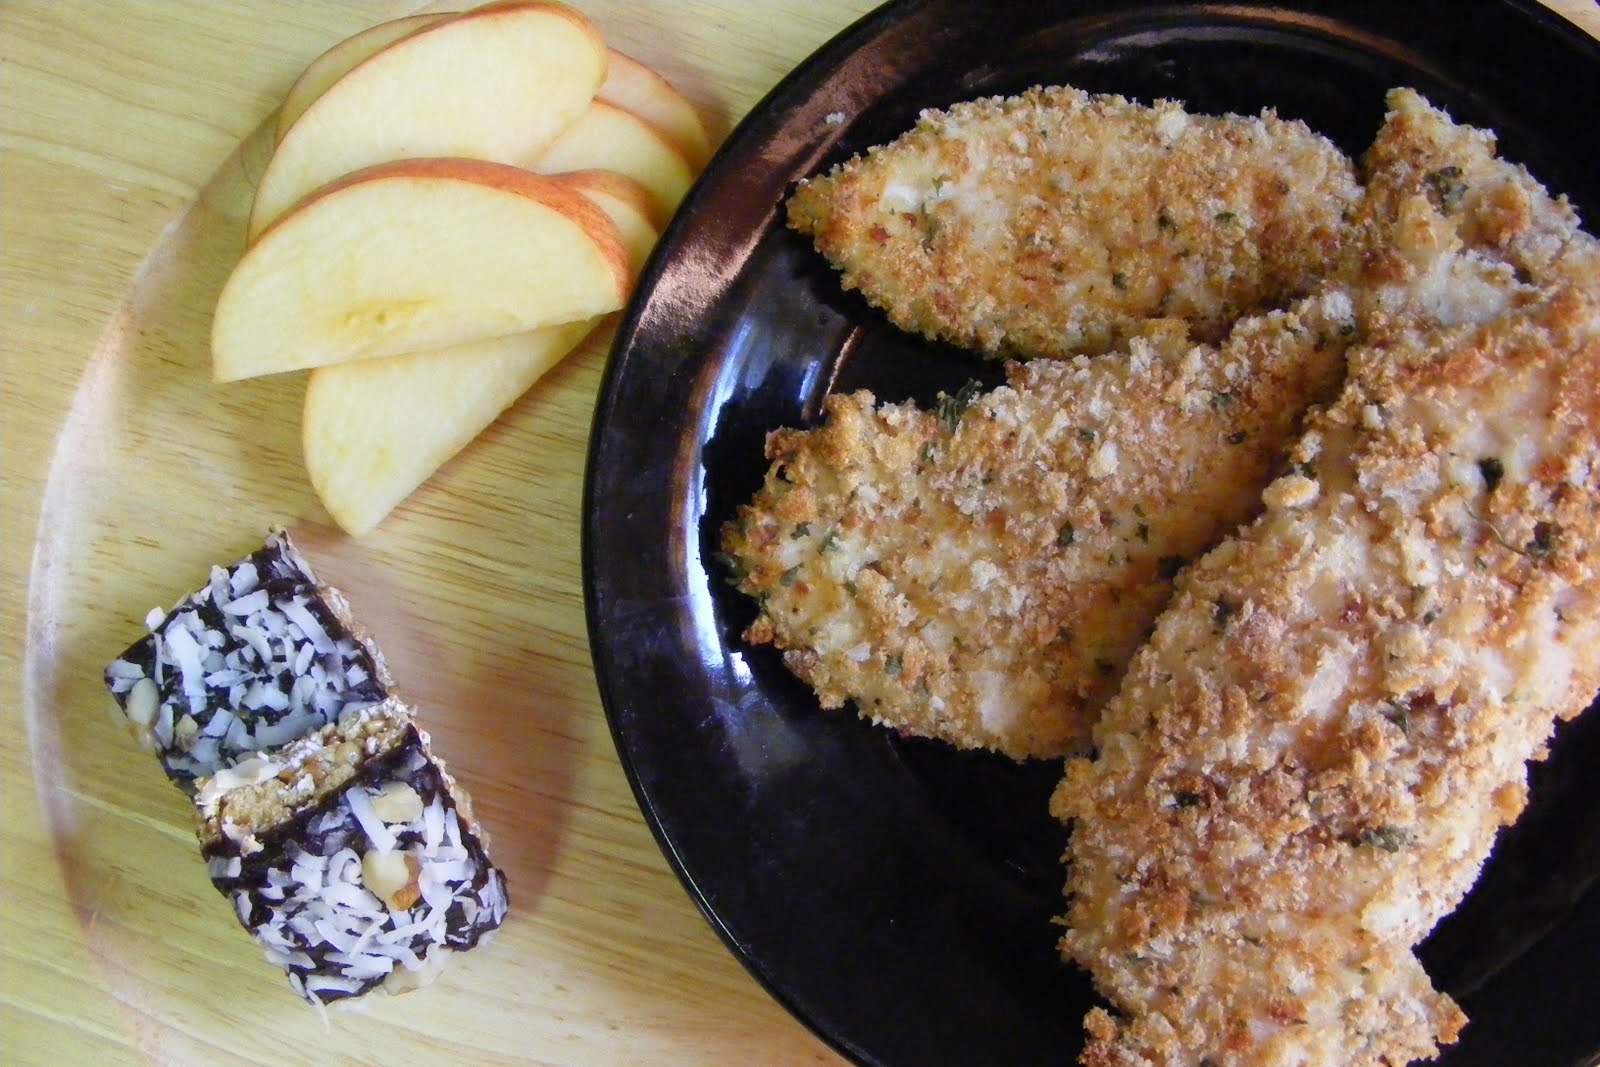
    For my second installment of "Back to School Lunch Idea's", I thought I would make Homemade Chicken Fingers. Every child likes Chicken Fingers don't they? Mine does anyway. And if your child does as well, chances are you are already buying them. By making your own, you get 15 healthy chicken fingers for the price of two chicken breasts. Rather than paying the absurd prices they charge for the ready made chicken fingers at the grocery store. You can get the mystery meat dark meat fingers for an affordable price, but who wants to eat those.

Homemade Chicken Fingers:


Ingredients:

2 boneless skinless chicken breasts
1/2 cup white bread crumbs
1/2 cup whole wheat bread crumbs
1/2 cup whole wheat flour
2 Lg. eggs, lightly beaten
2 Tbsps. water
kosher salt
fresh ground pepper
1/4 cup parmesan cheese, grated
2 Tbsps. parsley

Directions:

(1) Form a small assembly line with three shallow containers.


(2) In the first container combine the whole wheat flour. Season with salt and pepper.
(3) In the second container scramble together the eggs and the water until frothy. Season with salt and pepper.
(4) In the third container combine the bread crumbs, parmesan, parsley and season with salt and pepper.
(5) Using two pieces of parchment paper (or a large plastic bag) as well as a meat mallet, pound out the chicken breasts until they reach about 1/2" thick.


(6) Cut the cutlets into as many 1 1/2" strips as the size allows.


(7) Starting with the flour, the then egg bath, and lastly the bread crumbs, bread the chicken strips.
(8) Place on a lined baking dish and freeze. Once frozen place in a freezer safe bag or container until ready to use.


(9) Once ready to use, preheat the oven to 350 degrees F. Bake for 30 minutes (15 minutes on each side).
A healthy meal, equals a happy child


*This recipe yields approximately 15 Chicken Fingers.

Tuesday, April 19, 2011

Grillin' it up, Tandoori style...

    Since I had my Tandoori Masala prepared, and the weather was nice enough for a BBQ, I made Tandoori Chicken.
    Tandoori Chicken is a super popular Indian/Pakistani dish. It is traditionally prepared at high temperatures in a tandoor or clay oven (all I had at my disposal was the good old propane grill in my backyard. Which worked great by the way). It's marinaded in Tandoori Masala, a curd of some sort (commonly plain yogurt or sour cream), as well as lemon juice, fresh cilantro leaves and some salt and pepper. Cayenne pepper or red chili powder are used to give it the traditional red hue.
    I didn't add the cayenne pepper because I was sharing with my little guy, and his delicate palate couldn't handle something that spicy. So my chicken doesn't have the "blood red" color commonly associated with Tandoori Chicken, but it still has all of the flavor.....or most of it anyway.


Tandoori Chicken:

Fresh from the grill...
The top is a little charred, but it's still
delicious.
Ingredients:
1 rotisserie sized chicken
1/2 cup plain yogurt
2 Tbsp. fresh lemon juice
1 Tbsp. minced garlic
1 Tbsp. fresh ginger, grated
4 Tbsp. tandoori masala
4 Tbsp. cayenne pepper
1/4 tsp. freshly ground pepper
salt to taste
1 Tbsp. fresh cilantro

Directions:
(1) Prick the chicken all over with a fork. Then using a sharp knife, score the flesh to allow the marinade to penetrate.

(2) Rub the chicken all over with the cayenne pepper (I skipped this step).
(3) Place the chicken in a large resealable plastic bag.
(4) In a large bowl combine all remaining ingredients to create the marinade. Stir until well mixed.
(5) Pour into the bag over the chicken. Seal the bag, and coat the chicken with the marinade.

Seee ya tomorrow...
(6) Place on a tray and refrigerate. Marinade for 8 hours to overnight. (Do not marinade for more than 2 days).
(7) Once ready to cook, remove the chicken 30 minutes before cook time.
(8) Preheat your grill to 400 degrees. Place the chicken on a roasting stand, and place the roasting stand on a tray to catch the drippings.
(9) Remove the chicken from the marinade, pressing lightly to remove the excess. Place the chicken on the roasting stand.


(10) Once the chicken is in place on the grill, cook using indirect heat. (For the side of the grill that the chicken is on, turn the heat to low. The other side should remain on high. You will need to pay careful attention to the chicken from this point on, rotating it every 20 minutes. This will keep one side from being cooked before the other).
(11) Cook for an hour or until the chicken reaches an internal temperature of 170 degrees F.


(12) Once cooked, place on a serving platter and let rest for 10 minutes.


(13) Serve with lemon, red onion, cucumber and sprigs of fresh cilantro if desired.

* Alternately you could use chicken pieces and cook the straight on the grill