Showing posts with label Kids. Show all posts

Saturday, December 17, 2011

Crafts from the Kitchen

    Last year I got the greatest idea from a girlfriend of mine (If you're reading this you know who you are). She made a batch of Gingerbread Cookies and turned them into Christmas Tree decorations. I thought it was the cutest thing.
    So this year I decided to do the same and share the idea with all of you...

Gingerbread Christmas Tree Ornaments:


Materials:
1 batch of Gingerbread Cookies
1 batch of Confectioners Frosting
Approximately 6 feet of twine
medium sized Ziploc Bags
Assorted icing tips and couplers
Assorted food colors
1 - straw
scissors

Directions:
1) Bake a batch of Gingerbread Cookies. While making the Gingerbread Cookies, be sure to add a hole for the twine using a straw.


2) Slice a corner off the bottom of a ziploc bag. Fit with icing tip and coupler.
You will need as many Ziploc Bags,
as you want colors of icing.
3) Fill the ziploc bag with colored icing.


4) Begin decorating.
5) Let the frosting dry for a few hours and then add the twine.


* I made these cute Gingerbread men for the pine Garland in my Kitchen...


...and these Christmas Tree's, for my Christmas Tree.


*Alternately you could use these for Gift Tags. Just pipe names on the cookies, and add them to the gift.

Saturday, August 27, 2011

Back to School Lunch Ideas: Part II

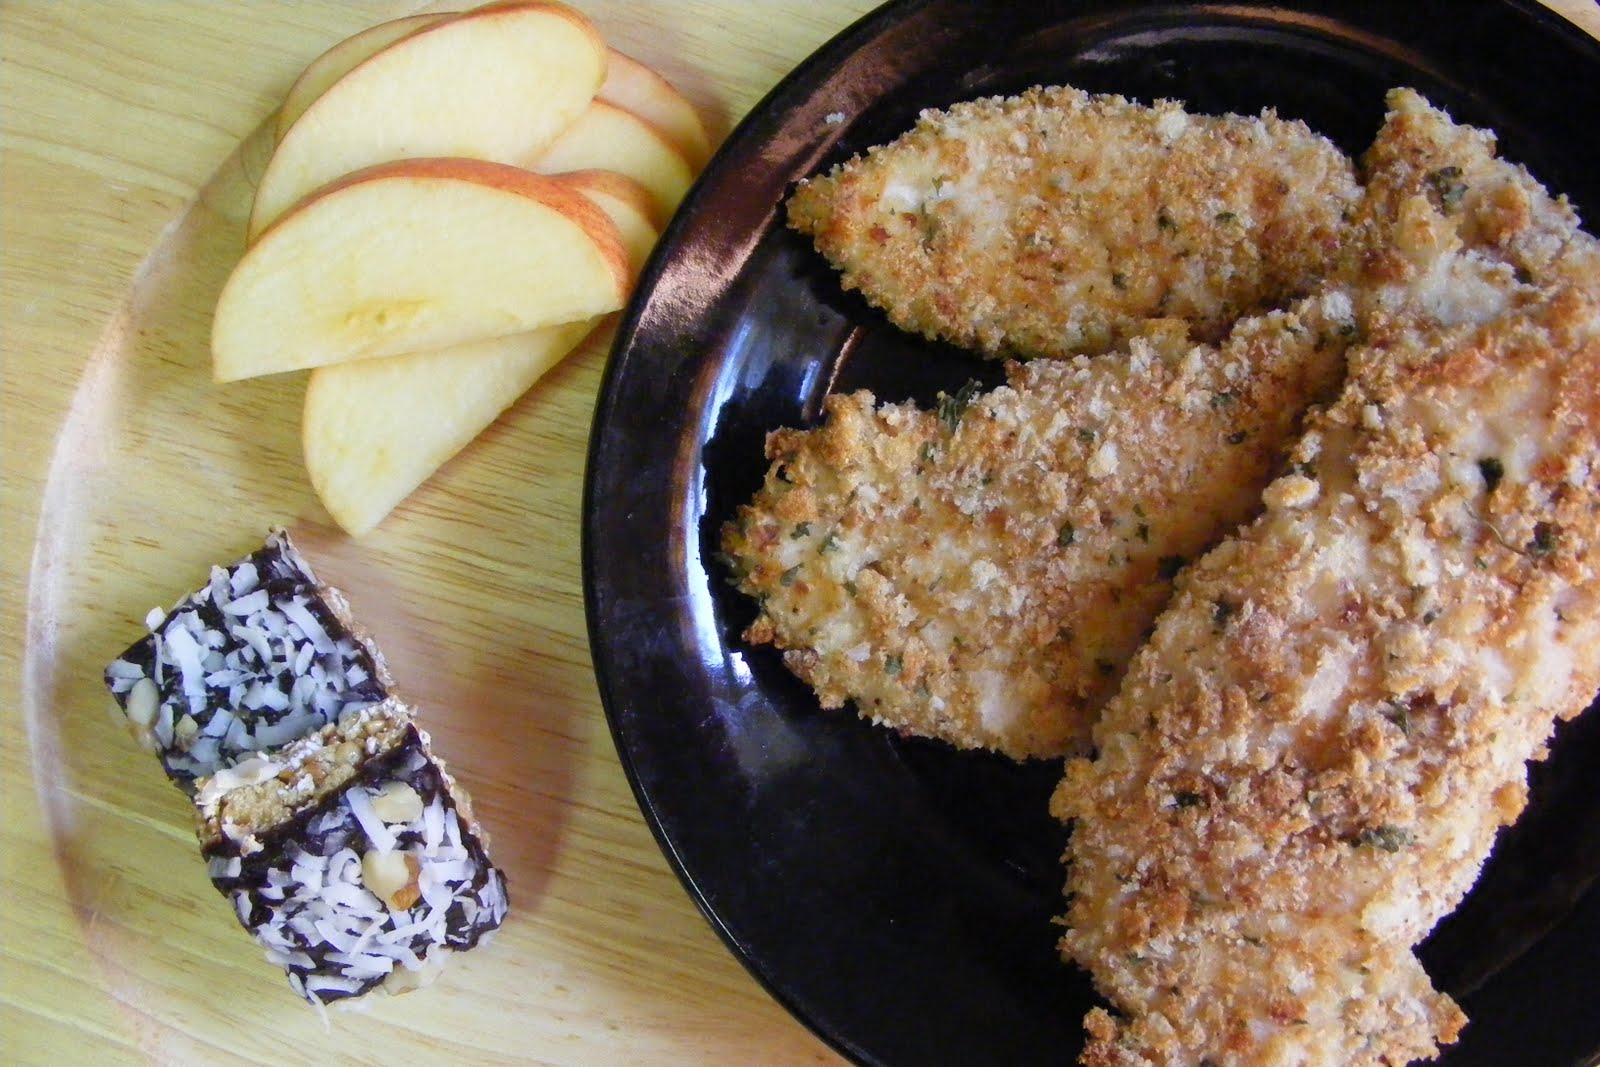
    For my second installment of "Back to School Lunch Idea's", I thought I would make Homemade Chicken Fingers. Every child likes Chicken Fingers don't they? Mine does anyway. And if your child does as well, chances are you are already buying them. By making your own, you get 15 healthy chicken fingers for the price of two chicken breasts. Rather than paying the absurd prices they charge for the ready made chicken fingers at the grocery store. You can get the mystery meat dark meat fingers for an affordable price, but who wants to eat those.

Homemade Chicken Fingers:


Ingredients:

2 boneless skinless chicken breasts
1/2 cup white bread crumbs
1/2 cup whole wheat bread crumbs
1/2 cup whole wheat flour
2 Lg. eggs, lightly beaten
2 Tbsps. water
kosher salt
fresh ground pepper
1/4 cup parmesan cheese, grated
2 Tbsps. parsley

Directions:

(1) Form a small assembly line with three shallow containers.


(2) In the first container combine the whole wheat flour. Season with salt and pepper.
(3) In the second container scramble together the eggs and the water until frothy. Season with salt and pepper.
(4) In the third container combine the bread crumbs, parmesan, parsley and season with salt and pepper.
(5) Using two pieces of parchment paper (or a large plastic bag) as well as a meat mallet, pound out the chicken breasts until they reach about 1/2" thick.


(6) Cut the cutlets into as many 1 1/2" strips as the size allows.


(7) Starting with the flour, the then egg bath, and lastly the bread crumbs, bread the chicken strips.
(8) Place on a lined baking dish and freeze. Once frozen place in a freezer safe bag or container until ready to use.


(9) Once ready to use, preheat the oven to 350 degrees F. Bake for 30 minutes (15 minutes on each side).
A healthy meal, equals a happy child


*This recipe yields approximately 15 Chicken Fingers.

Monday, August 22, 2011

Back to School Lunch Ideas: Part I

    My son has to be the World's pickiest eater. Each day last year, while I was preparing his lunch for school, I was constantly struggling to find something healthy and nut free for him to eat. He is really big on peanut butter, which we all know is a no-no in schools these days...so when he began Kindergarten last year I had to train convince him to eat ham sandwiches instead. Then he spent his entire school year, eating nothing but ham sandwiches.
    I made it my mission this year to try and seek out lunch ideas that varied from the traditional sandwich. Each meal needed to be nut free, easy to eat, and taste good without being hot (because they don't have a microwave in their classrooms). I came up with a few great ideas. I hope they help those of you who are struggling with the same problem.
    Now, I am aware that you can purchase most of these lunch ideas in the freezer aisle at the grocery store. However, I have strong reservations about eating, or giving my son anything that comes out of a prepacked freezer box. I cannot in good conscience, feed my child anything with a list of ingredients that I cannot pronounce. I would rather make my own, for a fraction of the price, and guarantee that what he is eating is healthy.
    My first idea was to make Homemade Pizza Pockets. To my surprise it only took my about an hour, and I made 18 of them. I did some research and a package of 4 at the grocery store can cost upwards to $6.00 a box (and you only get 4). I made all 18 Pizza Pockets for under $6.00, and I only used Organic ingredients. So not only did I save money, but now I know his lunch isn't filled with questionable ingredients.

  
Homemade Pizza Pockets:


Ingredients:

Dough:

cups white flour
1 cup of whole wheat flour
1 Tbsp. ground flax seed 
1 Tbsp. sugar 
1 1/2 tsps. salt 
1 tsp. baking powder
1/3 cup of shortening (I used margarine here) 
1 cup milk (more if needed)

1 egg (for eggwash)

Or, if you're looking for a thinner dough, my pizza dough recipe may work well also. I'm going to try using it next time around.

Filling: You could use basically anything you like but I used...

1/2 cup diced  turkey pepperoni
1 cup mozzarella cheese, shredded
1/2 cup pizza sauce (about 1 small can)

My work station


Directions: 

(1) In a mixing bowl, sift the flours, sugar, salt and baking powder, together.
(2) Cut in shortening.
(3) Stir in the flax seed.
(4) Pour the milk into the flour mixture all at once.
(5) Mix quickly using a wooden sppon. Add additional milk if the dough seems to dry or add additional flour if the dough seems to wet/sticky.
(6) Lightly knead it to make a thick dough.
(7) Let the dough rest for 10 minutes.
(8) On a lightly floured surface, roll out the dough and cut it into rounds using a biscuit cutter or the rim of a cup.
Cut out as many rounds as possible.
Set them to the side and re-knead the dough.
Roll out the dough a second or even a third time
and continue cutting until all the dough is used.

(9) Roll each of the dough pieces into 4 or 5 inch circles.

Keep the rounds covered with a damp cloth to
prevent them from drying out while you finish
with the remaining dough.

(10) Place your dough rounds into your pastry mold (skip this step if you don't have one).
(11) Combine all of your filling ingredients together into 1 bowl.
(12) Spoon two or three tablespoons of the filling of your choice into the center of each round.

I didn't combine my filling. I believe that if I had
I would have gotten a better end result. Now
I know for next time.

(13) Moisten edges with milk to ensure seal.
(14)  Fold together your pastry mold, or alternately fold over the dough and crimp the edges with a fork.
(15) Brush the outside with eggwash. This will create a golden brown crust. (1 egg and 1 Tbsp of water scrambled together. I skipped this step).
(16) Bake in a preheated 350 degree oven for 8-10 minutes. This will not cook them completely. You will finish cooking them the morning they go into the lunch box. 

Ready for the oven.

(17) Once the alloted time has elapsed, cool completely and portion the pizza pockets appropriately awaiting use.
(18) When you are ready to use them. Bake in a preheated 350 degree oven, for an additional 12 minutes.

Friday, April 22, 2011

Easter Egg Candy Cookies...

    This is the recipe for my little guys favourite cookies. We've been making these together for what seems like forever. They are usually made with traditional Reese's Pieces candy, and are supposed to be an Autumn themed cookie (because of the brown, orange and yellow colors). But the other day while I was at the grocery store I came across some of these candies that were in the shape of mini eggs. How great is that? A few years ago, I found them in green and red for Christmas as well, but haven't seen them since.
    We make these cookies at least once a month, so it's fun to be able to make them festive by switching up the candies. I hope you like them as much as we do.

Chocolate Peanut Butter Candy Cookies:

Chocolate Peanut Butter Cookies
with a nice cold glass of milk.

Ingredients:
1/2 cup white sugar
1/2 cup packed brown sugar
1/2 cup margarine or softened butter
1/2 cup peanut butter
1/2 tsp. vanilla
1 egg
1 1/4 cups all purpose flour
1/4 cup unsweetened baking cocoa
1 tsp. baking soda
1/4 tsp. salt
1 1/4 cups chocolate coated peanut butter candies

Directions:
(1) Heat oven to 350 degrees F.
(2) Lightly grease two 9x13" baking sheets with cooking spray.
(3) In the bowl of a stand mixer (or a large mixing bowl with a hand held electric mixer), beat sugars and butter on medium speed until creamy. Beat in peanut butter, vanilla and egg.
(4) In a separate mixing bowl, sift together flour, cocoa, baking soda and salt.
(5) Slowly combine dry ingredients into the wet ingredients. Stir in candies. (If your making this recipe with the egg shaped candies, don't add them here. They are far to large and cannot be stirred into the dough properly. I just added them near the end to the top of the cookie).

(6) Drop the dough by Tbsp. fulls onto the greased cookie sheets.

(7) Press the cookie dough mounds down with a wooden spoon and decorate with a few more candies. (This is where I added the egg candies)
(8) Bake for 8-10 minutes, or until edges are set. Centers will still be soft. Cool for 1 minute and remove from cookie sheet to rack.

 
* Makes 24 cookies

You may also like:

Sunday, April 17, 2011

Easter Egg Fun

    A favourite childhood activity of mine during April was Dying Easter Eggs. We had another rainy day to fill today so I thought it would be fun to dye eggs with my little guy. After all, Easter only comes around once a year. I figure I might as well take this opportunity to do something festive.
    If you have eggs, food coloring, vinegar, some tap water and an hour or so to spare you might find this fun as well. We had a great time.
    While dying the eggs, we used the hard boiled egg method (which is apparently the easiest method). I tried a bunch of different times to "drain" the egg from the shell but this is harder than it sounds. I could never make the holes large enough for the egg to actually drain out, without ruining the shell altogether. I tried blowing air in the holes and also letting the punctured eggs sit on a tray over night to drain out...but nothing worked. So I didn't "choose" to use hard boiled eggs, as much as I had no other option. Maybe I'll go another way next year.

Dying Easter Eggs with Food Coloring:


Materials:

Eggs
Water
Vinegar
Glasses (1 for each color of dye)
Spoons  (1 for each color of dye)
Paper Towel
Food Coloring (As many different colors as you want)
Empty Egg Carton


All ready to go...

Directions:      

(1) Hard boil your eggs as desired.
(2) In each glass, mix together warm water with a Tbsp. of vinegar and 8-10 drops of food coloring. I used my Wilton gel colors, and once they dissolved in the warm water, they worked great.
(3) Submerge your eggs and leave them in there until they reach the desired color. About 10-15 minutes. All I had on hand were brown eggs, and I was worried that the colors wouldn't show through. This wasn't the case. As long as the dye is intense, they will work just fine.


(4) Once the eggs have been dyed, dry them off with a paper towel.
(5) Place them on an upside down egg carton to allow them to dry.


(7) Admire your beautiful eggs!

* The food coloring will dye your eggs a small bit. But this doesn't mean you can't eat them. Just peel them and turn them into Deviled Eggs, Egg Salad Sandwiches etc.


Saturday, April 16, 2011

Easter Cookies on a Rainy Spring Day

    Today was the most perfect day for baking cookies. It was raining, and I had been wanting to spend a day in the kitchen for some time now. Being that this is the last weekend before Easter, I figured it was now or never for these cookies.
    Whether you're baking shortbread, gingerbread, or sugar cookies....they're gonna take the better part of the day to make. That's why I waited for a weekend to make them. From start to finish, you are going to need about 5 hours to complete the making of the dough, making and coloring the icing, rolling out and cutting the dough into cookies, baking and cooling the cookies, and then decorating them. It's the perfect way to kill a day where you have nothing else on the agenda....We had a great time together.

Sugar Cookies:


Ingredients:
 
3 cups all purpose flour
1/2 teaspoon salt
1 teaspoon baking soda
1 cup unsalted butter, room temperature or margarine 
1 cup granulated white sugar
2 large eggs
2 teaspoons vanilla extract


Directions:

(1) In a large bowl, sift together the flour, salt and baking soda.
(2) In the bowl of a stand mixer (or with a bowl and a hand held electric mixer), beat the butter and sugar until light and fluffy (about 3-4 minutes).
(3) Add the eggs and vanilla extract and beat until combined.
(4) Add the flour mixture and beat until you have a smooth dough.
(5) Divide the dough in half, and wrap each half with plastic wrap. Place in the fridge for at least one hour, or until the dough has become firm enough to roll.


(6) Preheat oven to 350 degrees and place the rack in the center of the oven.
(7) Line 2 baking sheets with parchment paper.
(8) Remove one half of the dough from the fridge, and on a lightly floured surface roll out the dough to a thickness of 1/4 inch. Cut out desired shapes using a lightly floured cookie cutter, and transfer cookies onto a prepared cookie sheet.


(9) Place the baking sheets with the cut out cookies on them into the fridge to chill for 15 minutes. (This will prevent the cookies from spreading and loosing their shape while baking).
(10) Bake cookie for about 8-10 minutes, depending on their size, or until the edges are just barely starting to brown. (I always cook my cookies for the least amount of time specified by my recipe. For instance, I cooked these for only 8 minutes. Once you remove them from the oven, the internal heat will continue to cook them without drying them out. Resulting in a moist end result).


(11) Remove from oven and transfer to a wire rack to cool.


*This recipe yields 24 Large Cookies.


Confectioners Frosting:

Ingredients:

2 cups confectioners sugar (icing or powdered sugar, sifted)
1/2 cup unsalted butter, room temperature (margarine will also work well)
1 tsp. vanilla extract
assorted food colors, if desired

Directions:

(1) In the bowl of a stand mixer (or with a bowl and a hand held electric mixer), cream the butter until smooth and blended.
(2) Add the vanilla extract.
(3) With the mixer on low speed, gradually beat in the sifted sugar.
(4) Scrape down the sides of the mixer and the beaters. Beat on high until light and fluffy. 3-4 minutes. (If you find the frosting to be too dry, add a small amout of milk to loosen it, and beat on high for another 30 seconds or so).


Divide the frosting into as many containers as
you want colors.


Remove a small amount of the corner from
as many resealable plastic bags as you have
colors of icing.


Fit each bag with a coupler and various
icing tips. Fill each bag with a different
color icing.


Frost the cookies, and let dry. Place in an
air tight container.


Thursday, April 7, 2011

6 Delicious Fruit Smoothie Recipes

    Every once in a while my little guy gets a hankerin' for some "Boester Juice". No this isn't a typo, he actually pronounces it "Boester Juice". I think it's so cute, I can't bring myself to correct him. But since we don't have a Booster Juice in this corner of the world, I am left to make something similar myself.
    I often keep frozen fruit in my fridge, so it's just a matter of deciding what I want the Smoothie to taste like. Today I threw some frozen strawberries, frozen mangoes, frozen banana, kiwi, pineapple and a peeled red apple into my blender. Next, I had some raspberry yogurt that was fast approaching it's best by date, so I tossed that in there too. I added some cranberry juice (because that's all I had on hand), as well as some water to help the blender along, and started the blender to liquefy. And that's all it takes to please my five year old.
    This is also something that I eat as a post gym snack. I'll fill the blender pitcher with whatever ingredients I have laying around, blend it up, pour out a portion for the little guy and then add some protein powder for myself (protein will not harm your child. I just feel it's something he doesn't need to add to his diet). This usually keeps me full right up until lunch time. If you are being conscious of your calorie intake, it is important to know that a smoothie is generally a meal replacement. It should not be used as a beverage to accompany a meal.
    I use frozen banana's when I make smoothies. When the banana's have been blended from frozen, they create a creamier texture than those that have been just tossed in at room temperature. This way I also have a use for banana's that are starting to over ripen. There's only so much banana bread someone can eat. Peel the banana's that are starting to show brown spots and cut them into chunks. Put the chunks into a resealable plastic bag and pop it in the freezer.

Fruit Smoothies


    Here are 6 smoothie "recipes" that I often play around with;

(Adapted from The Ab's Diet by David Zinczenko)

Summer Smoothie:
2/3 cup frozen strawberries
1 banana
1/2 cup cubed honeydew melon
4 oz low fat vanilla yogurt
3/4 cup 1% milk
2 tsp. vanilla protein powder (optional)
3 ice cubed, crushed

* Makes two 8oz servings

PB & J Smoothie:
3/4 cup low fat vanilla yogurt
3/4 cup 1% milk
2 tsp. peanut butter
1 medium banana
1/2 cup frozen unsweetened strawberries
2 tsp. vanilla protein powder (optional)
4 ice cubes, crushed

* Makes two 8oz servings

Halle Berries Smoothie:
3/4 cup instant oatmeal, nuked in water or fat free milk
3/4 cup fat free milk
3/4 cup mixed berries (blueberries, strawberries, raspberries)
2 tsp. protein powder (optional)
3 ice cubes, crushed

* Makes two 8oz servings

Banana Split Smoothie:
1 Banana
1/2 cup low fat vanilla yogurt
1/8 cup frozen orange juice concentrate
1/2 cup 1% milk
2 tsp. protein powder (optional)
6 ice cubes, crushed

* Makes two 8oz servings

(Adapted from Janet and Greta Podleski's Eat, Shrink and be Merry)

Fuzzy Peach Smoothie:
1 carton (6oz) peach yogurt
3/4 cup 1% or skim milk
1/2 cup each frozen banana and frozen peaches
2 Tbsp. frozen orange juice concentrate
1/3 cup vanilla protein powder (optional)

*Makes two 8oz servings

Peanut Butter Bananarama:
1 carton (6oz) vanilla yogurt
1 cup ice cold water
3/4 cup frozen banana chunks
3 Tbsp. natural peanut butter or almond butter
handful of crushed ice
1/3 cup vanilla protein powder (optional)

* Makes two 8oz servings

    There is often some of the smoothie mix left over. Instead of tossing it away, I pour it into convenient popsicle moulds I found at the Dollar Store. I have convinced my little guy that these healthy snacks are actually "treats". He gets pretty excited when he gets to eat a popsicle.


Smoothie Popsicle's ready for the freezer.

Thursday, March 24, 2011

An After School Snack, Parents can also Enjoy.

    Since my husband decided to skip the country again, I am left here to cook for myself. My little guy has a limited palate consisting mostly of PB & J or Macaroni and Cheese. But he won't turn down Guacamole when given to him. Because of this I try to keep avocados in the house so  I can whip up a batch when the occasion arises. So once school was over today and snack time rolled around, out came the Guacamole.
    The main ingredient in Guacamole is avocado. Some people love them and others hate them. I happen to love them. They are good for your skin and hair, help to lower cholesterol are higher in potassium than a banana etc. etc. But health benefit's aside, they're delicious. You can't go wrong with an avocado.
    My most favourite way to eat avocado is in Guacamole. You can eat it on a tortilla chip, with some crisp veggie sticks or simply on it's own. But it doesn't have a very long shelf life, so you want to make it shortly before serving. If you do need to store it for an extended period of time, do so in a tall, thin container. This way there will be limited surface area for any oxidation to take place. And once it does occur, you can just scrape off the top layer and the rest will have remained a beautiful green color. However, I don't recommend storing it any longer than 3 days. Any longer and the quality will quickly go down hill.
    There are about a thousand ways to make Guacamole. Most preparations have two things in common. First and most importantly is, well, Avocado. It is Guacamole after all. And second, lime juice. This is to slow down the oxidation and add flavor. But of all the different ways to prepare Guacamole, I prefer my recipe. Maybe one day I'll try switching it up, but for now I'm gonna stick to what works.

Guacamole:
Guacamole with tortilla chips and veggies
for dipping.


Ingredients:

2 avocados
1/4 cup red onion, diced
1/4 cup red pepper, diced
1/4 cup fresh cilantro, chopped
1 tsp. jalapeno chopped, seeded and de-veined (more or less depending on how spicy you like your food)
1/2 tsp. salt
2 Tbsp. fresh lime juice

Directions:

(1) Remove skin and pit from avocado.
(2) Mash avocado, leaving some lumps for texture.
(3) Add the rest of the ingredients, and stir to combine.
(4) Transfer to serving dish.

All the fixin's
Cut the avocado lengthwise in half
around the pit. Carefully and firmly,
strike the exposed pit with the sharp
edge of the knife. While grasping the
avocado, twist the knife to loosen
and remove the pit.
Do not over mash. Leave some body
to the avocado.


*This recipes yields 8 Tbsp. of Guacamole

Nutritional Value
(Per 2 Tbsp. Serving)

Calories 84              
Total Fat 7.4g                    Fiber 3.5 g
Saturated Fat 1.1g             Sugars 0.7 g
Cholestorol 0mg                Protein 1.1 g
Sodium 243.9 mg              Carbohydrates 5.3 g

Thursday, March 10, 2011

Finger Lickin' Good


    During my infinite quest to find fun activities for my little guy, I came across Pudding Paint. The idea instantly struck me as a winner. The moment I was in need of a new time waster, I pulled it out. And I was right. This little beauty of an activity, kept the wee one distracted for a whole hour. That NEVER happens. My child has many remarkable qualities, but being able to focus on a task is not one of them. I often find myself, taking time to prepare an activity for him, and he has become bored with it before it has even started. It can be exhausting to say the least.
    Anyhow, like most children's activities it doesn't require you to spend a lot of money, and the supplies needed are generally found around the house. Once prepared, the pudding can safely last in the fridge for at least three days. If you are planning on having more than one "Pudding Paint Day", divide the product into separate containers. You don't want to reuse it after little hands have been in there playing with it.

Pudding Paint

Materials Needed

Materials

  • 1 package of vanilla pudding, prepared according to package instructions (It usually calls for milk but I used water instead. The end result will just be a little more watery, and this way you won't waste your milk)
  • food coloring, an assortment of colors (I used red, blue and yellow. You can pretty much combine these three colors to make any color you want)
  • bowls (1 for each color of pudding paint you want to create)
  • paper  
  • rotary mixer or stand mixer to prepare pudding

Directions

1) Prepare pudding according to package instructions and place in refrigerator to chill for at least 5 minutes.
2) Divide pudding as desired
3) Mix food coloring into the separated pudding, until it has been well incorporated.
4) Create a safe area for painting, away from anything the might get ruined in the event of an accidental spill.

*I managed to find a large roll of white paper that I use for activities such as this one. I roll it out and tape it to the floor. That way if anything spills, I can just pull out the mop and bucket

Artist at work