Showing posts with label Main Course. Show all posts

Friday, April 8, 2011

Silly for Chili

    Cooking for one can become a bit of an annoyance. As much as I love to cook, I love sharing what I have created. When their isn't anyone around to share what I have made, it becomes a chore.
    When I get to the point where I can't be bothered anymore to cook a new meal everyday, I start making big batches of freezable meals. Meals that require me to cook once, and yield a ton of freezable leftovers. Then I can thaw and heat, without effort. This keeps me from making bad, last minute food choices.
    Since I had the ingredients for Texas Chili, a recipe I adapted from Tyler Florence's Ultimate Cookbook, I decided to make that. It takes some time to make, but most of that time is just simmering on the stovetop. This was right up my alley since I had a bunch of other things to take care of today.
   
Texas Chili:
Texas Chili with Jalapeno Cornbread Muffins
Ingredients:
3 lbs. beef chuck, cut into 1" cubes
2 onions, chopped
4 cloves garlic, chopped
3 Tbsp. extra virgin olive oil
salt and pepper for seasonin the beef
2 Tbsp. Recipe Ancho Chili Powder
2 (28oz) cans crushed tomatoes
1 can corn niblets
1 can mixed bean medley, rinsed
1 cinnamon stick
1 tsp. sugar
1/4 cup masa harina (you can subsitute with cornmeal)

*Garnish with tortilla chips, grated cheese, avocado and/or sour cream

Directions:
(1) Boil a kettle full of water.
(2) Heat a heavy bottomed casserole pot over medium high heat. Add the olive oil, onions, and garlic. Sautee until the onions begin to caramelize. About 5 minutes.
(3) Dry the beef cubes with a paper towel. Add to the casserole pan. Cook until browned.


(4) Add Ancho Chili Powder, tomatoes, cinnamon stick and sugar. Stir to combine. Bring to a boil.


(5) Add hot water from the kettle until meat is covered. Return to a boil and reduce to simmer. Cover and cook for 1 1/2 hours.
(6) Stir in beans and corn niblets. Stir in masa harina (cornmeal) to thicken.
(7) Cook for an additional 10 minutes, uncovered to heat through and for the cornmeal to take effect.
(8) Taste and adjust seasonnings. Garnish and serve.

Garnished with Corn Tortillas

Stored in plastic, air tight containers,
ready for the freezer.

* This recipe makes 10, one cup servings.*Pair's well with Jalapeno Cornbread Muffins 
   
    I have made this recipe using a slow cooker as well and it turned out great. Just pre-cook the beef, load all of the ingredients into the insert (except the masa harina/ corn meal), and cook on low for 8 hours. Once the 8 hours have passed, add the cornmeal. Put the lid back on and turn the slow cooker to the high setting for one more hour. Garnish and serve.)

Saturday, March 12, 2011

Curry-ously Delicious

    A while ago I found the most delicious looking recipe for a Red Thai Duck Curry on a blog I frequently follow (The Pioneer Woman). I got around to making it for the first time tonight, and it did not disappoint. It had the perfect balance of sweet, salty, sour and spicy  very spicy, that you expect to get from eating Thai food. If you are a fan of curry at all, you must try this.
    The recipe calls for a Red Curry Paste. Coincidentally I had hunted down all the ingredients to make this myself on a recent trip to Montreal. Once I made it, I portioned it out and froze it for later use. It kept well, and I used it in tonight's recipe. You can purchase red curry paste already made in the Asian aisle of your supermarket, but the flavor nuances are lack luster in comparison to the homemade product.
    I had also found some beautiful looking duck breasts on the same trip, and couldn't pass on the opportunity to give them a try as well. This recipe originally suggested "pan frying" the breast until cooked. I decided to sear and reduce the fat on top of the breast until it was nothing but a delicious crust (Draining the fat as needed). I then flipped the breast over and transferred the entire oven proof pan to a preheated oven to finish cooking. I cooked the breast to a moist medium well, and let it rest until I was ready to use it on the curry.
   Typically, Thai style curry dishes are paired with an aromatic rice like Basmati or Jasmine. But in my quest to cut calories from an already calorie ridden dish, I replaced the rice with a cauliflower "rice". It added an unexpected "creamy butteriness", that I really enjoyed. As a lover of all rices, I was thinking I would regret my decision to subsitute. But I did not. This recipe has made my top 10 favorites list. I can't wait for Lunch to eat my leftover's.
 

Red Thai Duck Curry

Red Thai Duck Curry on Cauliflower Rice
Ingredients:

1 whole boneless duck breasts, fat on if desired
2 tbsps. olive oil
3 cloves garlic, minced
3 tbsps. red curry paste (store bought or homemade)
1 14oz can full fat coconut milk
1 cups hot water
2 tbsps. fish sauce
1-2 tbsps. fresh ginger, grated
2 tbsps. olive oil (additional)
½ whole red onion, sliced
1 whole green or red bell pepper, cored and sliced
1 cup grape tomatoes (I omitted these)
2 cups fresh pineapple, cut into chunks
1/4 cup fresh cilantro, chopped (the original recipe used basil)
Jasmine rice cooked (or you can use cauliflower "rice")

Directions:

(1) Preheat oven to 350 degrees F.
(2) Wash and dry duck breast. Score the fat on the breast.


(3) Place in a preheated (oven safe) pan, that has been set over medium high heat, fat side down. Cook for several minutes, draining the fat as needed. You will know the fat is finished searing, when it has become crispy and golden brown in color. (Don’t worry about cooking the duck at this point. You just want to give the skin some great color. You will finish cooking in the oven).
(4) When the duck has rendered it's fat and has reached the desired crispness, drain off the remaining fat. Flip the duck breast so it is fat side up. Transfer to the oven for 8- 10 minutes. (8 minutes for med well, 10 minutes for well done).
(5) Once the duck breast has reached it's desired doneness, remove from the oven and let rest.

Let tht duck breast rest for a
few minutes.

Thinly slice the duck breast.

(6) Now, start creating the curry. In a clean saucepan, heat 1 tbsp. of  olive oil. Go ahead and add the minced garlic to the pan. Add red curry paste to the pan and stir. Cook paste for several minutes to release the flavors.


(7) Pour in the coconut milk, hot water, fish sauce, and minced ginger. Stir and allow to cook over low heat for 10 to 15 minutes while you prepare the other ingredients. Reduce until it reaches a sauce like consistency.

(8) In a second pan, heat the remaining oil over medium high heat. Add sliced onions and bell pepper and cook for a few minutes, until vegetables begin to soften. About 3 to 4 minutes.


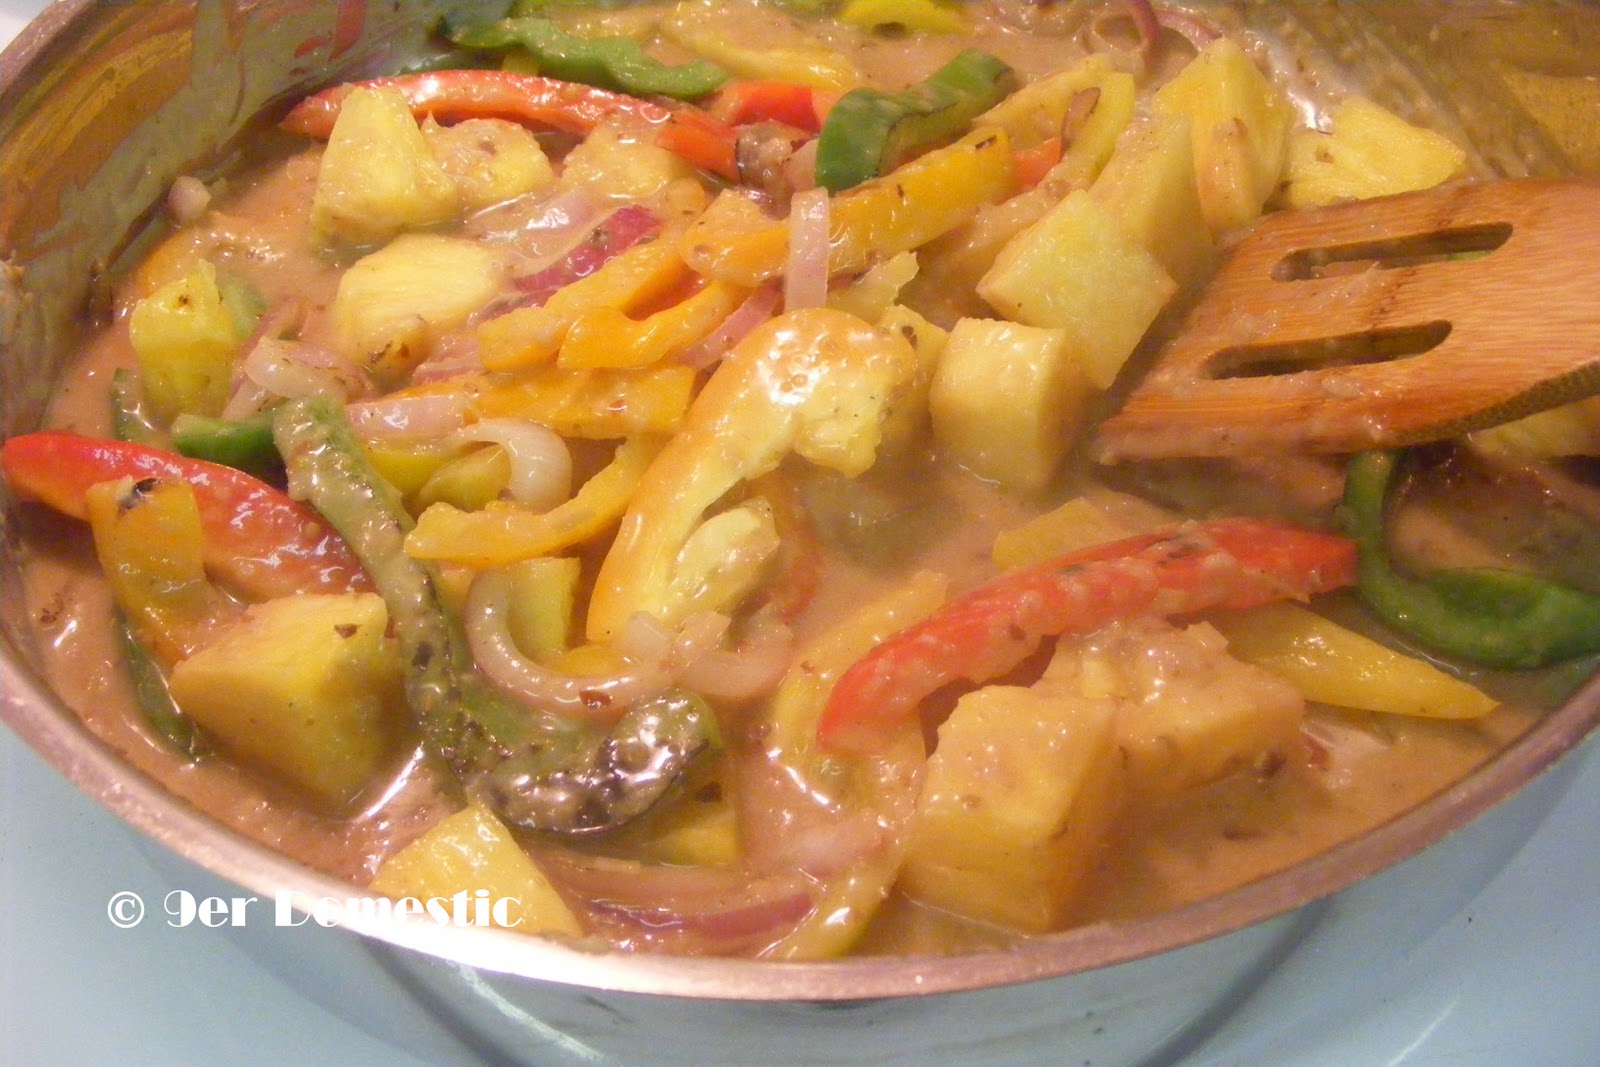
(9) Add pineapple and cherry tomatoes. Stir and cook for 2 minutes.
(10) Taste the curry sauce, which should be thickened by now. Add more spice if needed.

The sauce is thickened when a ribbon
appears after you scrape the bottom of
your pan with a spatula.
(11) Pour vegetables into the curry sauce. Stir to combine. Set heat to medium low, to keep warm. (Add a little hot water if it seems too thick, or allow to bubble longer if it needs more thickening). Remove from heat and allow to sit for 5 minutes.


(12) At the last minute, stir in the chopped cilantro. Serve curry mixture immediately over a hot bed of rice.

*Yields 2 Large Servings

Monday, March 7, 2011

Reaping My Reward

    Since I recently made a fresh batch of my Homemade "Free" Chicken Stock, I figured I may as well put it to good use. What better way to do this than to make a delicious Chicken and Sage Risotto for Dinner.
    It's super simple to make, and only requires a handful of ingredients that I always keep on hand anyway. (A no brainer if you ask me).

Chicken and Sage Risotto


Roasted Chicken, served with Chicken and Sage Risotto and Steamed Asparagus

1 cup of arborio rice
1 1/2 Tbsp. of butter or olive oil
1 lg. shallot, or 1/2 a medium sized red onion
5 cups of "Free" chicken stock 
1 Tbsp. of sage, finely chopped
1/2 cup of freshly grated parmesan or pecorino cheese
salt

1) Preheat 5 cups of chicken stock in a medium sized sauce pot.
2) Heat butter or oil in a deep sided, heavy bottomed pan.
3) If using butter, let it brown. If using oil, just bring to cooking temperature.  Add the shallot/onion and saute until it becomes fragrant.
4)Add the rice. Stir to coat with the butter or oil. Stir fry until the rice begins to toast and some of the grains have become browned.
5) Add about 1 cup (2 ladle fulls) of the hot stock.
6) Stir constantly, as the stock evaporates and becomes incorporated into the rice.
7) When the liquid is nearly absorbed (the pan should not be dry from liquid though), add another ladle full of stock, and repeat the stirring. If you do not constantly stir, you will not get the creamy starch to release from the rice. This starch creates a sauce.
8) After 2-3 ladles full of stock have been absorbed, add the sage. If you feel you need more, add more near the end of the cooking time. Taste for salt and add as needed; it will depend on your stock.
9) Continue this for about 25-30 minutes. Taste the rice after 20 minutes, and then monitor it. You may need more or less than 5 cups of broth. This depends on whether you like a loose risotto or a thicker denser style risotto.
10) Once the rice is cooked to your liking, stir in the cheese and let it cook another 1-2 minutes. Serve immediately.


Friday, March 4, 2011

What's for Dinner?

    I was going through my weekly meal plan earlier this morning, trying to decide what to prepare for Dinner tonight. I thought since it was Friday I would choose one of the "fancier" meals from the list. Our little guy doesn't have any extra-curricular activities tonight to rush us out the door shortly after we've finished eating. And we generally decide to stay up a bit later on Fridays to enjoy each others company. This leaves me with a larger window at meal time to whip up something extra delicious.
    I usually plan our meals based on items that I currently have on hand, combined with what happens to be on sale in the weekly flyer. All the while trying to eat healthy, and spend as little as humanly possible. After all, with the rapidly rising cost of living, who can afford to be wasteful with their hard earned cash.
    I find that preparing a meal plan ahead of time, as well as a shopping list to go along with the meal plan, prevents me from buying unnecessary items. And also prevents any last minute runs back to the grocery store to pick up forgotten ingredients while in the middle of preparation. Plus, if you already have something in the works for dinner you're less likely to be tempted to stop off for unhealthy take-out.
    So on the menu tonight is, Chicken Parmigiana over Whole Wheat Spaghetti w/ Caesar Salad. Now that I know I am eating a Dinner LOADED with carbs, I will run an extra 5K at the gym :)

Chicken Parmigiana
Chicken Parmigiana with Caesar Salad

Tomato Basil Sauce w/ Kalamata Olives

1/8 cup extra-virgin olive oil
1/2 medium onion, chopped
2 garlic cloves, minced
1/2 cup kalamata olives, pitted (optional)
8-9 fresh basil leaves
1 (28-ounce) can crushed tomatoes (I use canned organic tomatoes, I think conventional tomatoes taste like a cheap ketchup) 
1 tsp. sugar
salt and freshly ground black pepper

Chicken Parmesan
                
1 boneless, skinless chicken breast
1/4 cup all-purpose flour
1 large egg, lightly beaten with 1 tablespoon water
1/2 cup dried bread crumbs
1/4 cup freshly grated parmesan or pecorino cheese
1/2 cup mozzarella, grated 
Freshly grated parmesan or pecorino cheese, for garnish
1/2 lbs. of pasta (I prefer spaghetti, but anything will do)
1) Pour 2 Tbsp. of the olive oil into a sauce pot over medium heat. Preheat oven to 450 degrees F. 
2) Add onions and garlic. Cook until fragrant, and onions begin to become translucent. Do not burn the garlic. It will take on a bitter taste.
3) Slowly pour in the crushed tomatoes. Add olives and basil. Stir to combine.
4) Cook over a medium low heat until the sauce has reduced. (About 12-15 minutes)
5) Season with the salt and pepper.
6) Lower heat and keep warm.
7) Create a breading station for the chicken breast. (I use standard dinner plates for this and it works adequately) Plate number 1 should contain the flour, seasoned generously with salt and pepper. Plate number 2 should contain the lightly beaten egg with 1 Tbsp. of water. season with salt and pepper. Plate number 3 should contain the bread crumbs mixed with 1/4 cup of freshly grated parmesan or pecorino. Also seasoned with salt and pepper.

The breading station
8) Place the chicken breast inside of a clean plastic bag, and pound out using a meat mallet to approximately 1/2" thick. Cut into 4 like sized portions.
9) In a heavy bottomed, oven proof skillet, add the rest of the olive oil. Heat over medium high heat.
10) Begin breading the chicken breast pieces. Dredge the pieces first in the flour, then the egg mixture, and lastly the bread crumb mixture.
11) Place into the preheated pan, and fry until the underside becomes a nice golden brown.
12) Flip chicken, and immediately add some of the tomato basil sauce. Top with some of the grated mozzarella. Continue until all of the chicken pieces are topped with sauce and cheese.

I chose to bake these today.

13) Place pan directly into the preheated oven. Bake until cheese browns and begins to bubble. About 15 minutes.
14) Cook pasta according to package directions.
15) Ladle sauce over noodles, place chicken on top of pasta, dress with freshly grated cheese and basil.

The perfect bite.

Makes 3 portions

Nutritional Information Per Serving:
Calories 517           Total Fat 25.6g
Sat. Fat 6.4g          Cholesterol 52.9mg
Sodium 699.9mg    Carbohydrates 43.3g
Fiber 7.7g              Sugars 1.4g
Protein 29.7g

You may also like:
Spaghetti Bolognese