Tuesday, March 29, 2011

Freezing your Fresh Fruit

Mangoes


    I recently came across some beautiful looking mangoes that were on special for 50% off. So I bought 8 of them. I had planned to incorporate them into my meals for the week, but I was fearful that I wouldn't get to them all in time. So I ate what I could, and froze the rest.
    Freezing fresh fruit and berries, is something I do quite often. Whenever there is a sale on fruit or berries that we use regularly, I buy them up. I decided quite some time ago that I would stop spending double the price for convenience foods, and start creating them myself.
    Eight mangoes, once you cube them and remove the skin, yield about the same amount of fruit as in a bag of pre-frozen, "Europe's Best or No Name Mangoes". Only the pre-frozen fruit/berries can cost upwards to $7.50 a bag, and because I bought my mango's on special for $0.60 each, I only paid $4.80 for nearly the same amount. All it took was 10 minutes of my day to cube, freeze and place them in my own freezer bag.
    Think to yourself all the types of fruit, berries and vegetables you are able to buy pre-frozen. If you can buy it frozen, than you can freeze them yourself. (Generally the pre-frozen veggies are worth the buy, but if ever you have bought too many fresh peas for example...remove them from the pod and freeze them).
    Mangoes can be a bit tricky if you are unfamiliar with them. So I took a few pictures for those of you who may need some direction.


Mangoes have a flat, sort of oblong pit in their center. You need to
cut along the sides of the pit, separating the flesh from the pit. Holding
the mango with one hand, stand it on its end, stem side down. With a
sharp knife in your other hand, cut from the top of the mango, down one
side of the pit. Then repeat with the other side.


You should end up with three pieces - two halves, and a middle section that includes the pit.


Being aware of the pit, run your knife around the edge to remove the fruit.


Discard the pit.


Take a mango half, and use your knife to make lengthwise and crosswise cuts.
Try not to cut through the peel. Once the slices have been made,
turn the mango half, inside out. Carefully run your knife along the skin,
removing the the cubes of flesh you have created.


Lay the cubes of fruit onto a baking sheet that has been fitted
with a piece of wax paper. Place the baking tray into the freezer for
about two hours, or until the cubes have frozen through. (This will prevent it
from sticking together while it freezes, and forming one big lump).


Remove from tray and transfer to a resealable, freezer safe
bag. Use as needed.


Monday, March 28, 2011

No Business Like Dough Business

Thin Crust Pizza Dough
Adapted from Janet and Greta Podleski's Crazy Plates


Thin Crust Pizza Dough

Ingredients:

1 package of active dry yeast
1 cup of warm water (105- 115 degrees)
1 Tbsp. of honey
2 1/2 cups all purpose flour
1 1/2 Tbsp. olive oil
1 tsp. salt
olive oil cooking spray
2 Tbsp. cornmeal

Directions:

(1) Pour yeast into a large bowl. Combine warm water and honey. Pour over yeast. Let sit for 5-10 minutes, until mixture is foamy. Meanwhile, place all purpose flour in a separate bowl. Set aside.


This is what the yeast should look
like when it's time to add the flour.

(2) Add olive oil and salt to yeast mixture. Mix well. Add 1 cup of the flour. Using a wooden spoon, stir until smooth. Add a second cup of the flour and continue to stir until the dough forms a soft and sticky, (for lack of a better word) lump, and comes away from the sides of the bowl.


(3) Flour your work surface, and your hands with some of the remaining flour. Turn the dough out onto the floured surface, and knead in more flour until the dough becomes smooth and elastic (If you don't end up using all the flour, it isn't a bid deal). Shape the dough into a ball. Spray a large bowl with the olive oil spray and  place the dough inside. Cover with plastic wrap and let rise in a warm place for 45-60 minutes, until doubled in size. (I take a wet cloth, heat it in the microwave for about 35 seconds. Then I place the bowl with the dough inside the microwave along with the cloth. This creates a warm, draft free area for your dough to rise).


Before

After


 (4) Punch down the dough and return to the work surface. Divide the dough into two halves. (If you only need 1 pizza, form the second half of the dough into a nice neat ball. Wrap in plastic wrap, place into a freezer proof bag, and freeze until needed. When you are ready to use, let thaw in the fridge. Then once completely thawed, transfer to a bowl that has been sprayed with olive oil, and let rise as usual).
(5) With a rolling pin, roll the dough into a 12" circle. Place dough on a preheated pizza stone or a prepared pizza pan.


*This recipe usually takes about 120 minutes from start to finish. Makes two 12 inch pizza crusts.


Nutritional Value
Per Crust

Calories 695                       Carbohydrates 127.4g
Fat 13.9g                             Fiber 7g
Saturated Fat 0.5g               Cholestorol 0mg
Protein 18.5g                       Sodium 1171.7mg

Meatless Monday

    For a month or two now, I have been giving "Meatless Monday's" a try. "Meatless Monday" is a new food movement that spans all borders and demographic groups. The idea is to cut out meat one time per week, with the overall goal of  improving health, shrinking our carbon footprint (and our waste lines) as well as helping reduce global climate change.
    After all, if you eat less meat, you consume less saturated fat. This lowers your risk of heart disease and keeps cholesterol low. As an added bonus, it helps you maintain a healthy weight, and automatically adds more vegetable variety to your diet. I have also noticed the amount I spend on grocery's drop about $20.00 per week. That's $960.00 per year (I could plan a mini vacation for my family with that money now).
    I have to be honest, at first I thought that a "certain" member of my family would struggle with this change. But as of yet, I have had no complaints. I have just been planning very carefully, what type of vegetarian meals I choose to make. I don't think a tofu salad would go over very well at all.
    Since it was just me and the little guy this week I made something that I new he would really enjoy. I already had everything I needed on hand, so with his help, we made Pizza Margherita. Mmmm Mmmmm. It was delicious. Who says vegetarian food can't be wonderful.

Pizza Margherita

Pizza Margherita

Ingredients:

1 recipe Pizza Dough
1 cup Homemade Pizza Sauce
1 ball Mozzarella di Buffala (regular  fresh mozzarella will subsitute just fine)
8-10 leaves of Fresh Basil
Handful of Kalamata Olives, optional


Directions:

(1) Preheat oven to 450 degrees. While the oven is preheating, place pizza stone in oven to preheat as well. (If you do not have a pizza stone, a regular pizza pan will work fine. But you should really get one, they're fabulous. They about $13.00 at most kitchen specialty stores).
(2) Roll out the prepared pizza dough.
(3) Once the pizza stone has been heated through (this usually takes as long as the oven does), remove it from the oven, and sprinkle with cornmeal. The cornmeal will keep the dough from sticking. (You can do this with a pizza pan as well. It will save you the calories from the oil you would otherwize have to add to the pan).
(4) Place the rolled out dough onto the pizza stone. From this point on, the dough will begin cooking.
(5) Begin assembling the pizza. First add the sauce, and then the mozzarella.
(6) Place the stone back in the oven and bake the pizza for 10 minutes, or until the cheese has fully melted and has begun to brown.
(7) Once cooked, remove from oven and garnish with the fresh basil and kalamata olives.

Sunday, March 27, 2011

Tomato, Tomahto (Parte Terzo)

    I just couldn't take any more tomatoes. So out of the mountain of tomatoes that I still had left, I made Pizza Sauce. Thank Heaven's. They're all gone... Now on to the mango's.....lol. Oh my, sigh.
    When I got the idea for the pizza sauce, I was trying to find a way to use the tomato's so that they wouldn't be the main focus on the plate. I just couldn't eat another tomato. So the first thought I had was a sauce of some sort. I also knew if  I made a sauce, by the end of the day all my tomatoes would be gone, and I would be able to move on to something new. Tomato sauce for pasta would have been my first thought, had there not been about 15 jars already in my pantry. This past fall I spent about a month canning anything and everything I could get my hands on. Pasta sauce was one of the things I made an abundance of. But in any case, pizza sauce it was.
    When I make a tomato based sauce, the first thing I like to do is remove the skins. This is done the same way you would skin a peach, apricot, or plum. Just take a pearing knife and score the top and the bottom of the fruit by making a small "X" through the skin. Once done, drop all of the fruit into a pot of boiling water, and let boil for 30-40 seconds. No longer. You don't want to cook them, just loosen the skin.
    After the time has passed, immediately remove the fruit from the water and drop them all directly into an ice bath. This will shock them, and instantly stop the cooking. You will notice the skins begin to peel away from the flesh. Just let them sit for a minute or two, and then begin removing them.


Arrivederci


Gently slice through the skin on both
the top and the bottom.


Peel off the skins, cut into quarters
and place in an oven proof pan

    Once all the skins have been removed, cut the tomatoes into quarters and place into an oven proof pan. Pour in enough olive oil to cover all the tomato pieces and create a shine. Season with salt and pepper. Cover the baking dish with aluminum foil and place in an oven that has been preheated to 475*. You need the temperature to be high to "roast" the tomatoes. After the first half hour has passed, add the seasonings. Depending on your taste, and what you have on hand this will change. I used red onion, basil and garlic. These flavors always go well together.
    Give everything a stir to combine, and continue roasting for another 25-30 minutes. Once finished, let cool slightly, and transfer to a food processor to puree. And there it is. Homemade Pizza Sauce. And I didn't have to waste anything. Can't wait to use this.
    Because of the olive oil in this recipe, you cannot safely process this via water bath. If you have a pressure canner (which I am not fortunate to have), that will work nicely. But if not, and you have no need for this right away, freeze it in an air tight container.


Homemade Pizza Sauce


Tomatoes are peeled, quartered, seasoned and
ready for roasting.


After a half hour in the oven, add the
necessary seasonings.


Saturday, March 26, 2011

Tomato, Tomahto (Parte Seconda)

    Today, in my second attempt to rid myself of my giant surplus of tomatoes, I decided to make a simple Caprese Salad.
    Caprese Salad aka. Insalata Caprese consists of nothing more than three main ingredients. Mozzarella di Buffala (Mozzarella made from the milk of Water Buffalo), Tomatoes, and Basil, it is then seasoned with salt and pepper and drizzled with a really good olive oil. Words can't even describe how much I enjoy eating this. But because of the difficulty I have trying to find the Mozzarella di Buffala, I rarely get to make it. It can be made with any old regular fresh mozzarella or even bocconcini, but because of certain dietary restrictions, I don't have the luxury of making this substitute.
    This simple salad is fresh, low in calories and packed full of flavor. And if your taste buds want a little more zip, just drizzle it with a really good quality Balsamic Vinegar.

Caprese Salad:
Caprese Salad Stacks. Drizzle with a little
Olive Oil and some Balsamic Vinegar
for an amazing appetizer.


Ingredients:

1 ball of fresh mozzarella, sliced
3-4 small to medium tomatoes (an heirloom variety will work best)
6-7 fresh basil leaves
pinch of salt (a coarse or flake salt similar to fleur de sel)
coarsely ground fresh black pepper
olive oil and balsamic vinegar for drizzling

Directions:

(1) Stack one slice of the mozzarella, one slice of the tomato and then top with a fresh basil leaf.
(2) Continue until all of the food has been stacked in little bundles.
(3) Sprinkle with the salt and pepper and then drizzle with olive oil and balsamic vinegar. Do both these steps immediately before serving. The salt will release the juices from the tomatoes, and you don't want your tidy little bundles floating in a tomato soup.


Friday, March 25, 2011

Tomato, Tomahto

     Today I was staring at the copious amount of food in my kitchen, and wondering how on Earth I was going to be able to eat it all before it went bad. Right before Hubby got called away, we picked up groceries for an entire two weeks. For an ordinary family of three, this isn't a huge deal. But when the  member of the family who eats enough to feed a small African village leaves without notice, and the child in the family barely consumes enough food to keep a bird alive, the third family member (which is me), is left to deal with this dilemma alone.
    Now what's a girl to do. There is no way I'm going to be able to eat all this food. I'm thinking I might have to get creative. The first thing I figured I would attempt to tackle, were the tomatoes. After all, every time I walked into the kitchen, there they were staring me in the face. A giant Costco sized package of cocktail tomatoes, taunting me.
    So what better way to put a dent in a stock pile of tomatoes than Tomato Basil Bruschetta. So that's what I did. I made Bruschetta.

Tomato Basil Bruschetta:

Tomato Basil Bruschetta with Toasted Baguette


Ingredients:

8 cocktail tomatoes or 3 hot house tomatoes, (you can use any type of tomato you like, as long as the size ratio's match this recipe)
1/4 cup red onion, diced
2 cloves garlic, minced
3-4 leaves fresh basil, chopped
1 Tbsp. olive oil (use the best quality olive oil you have on hand)
pinch of coarse salt
freshly grated pecorino or parmesan cheese to garnish, optional
french baguette, sliced 1/2" thick (day old baguette works well, since you will be frying it anyway)

Directions:

(1) Add all diced ingredients to a bowl.
(2) Drizzle with olive oil and sprinkle with salt.
(3) Stir to combine.
(4) When serving with baguette, pour about 1 Tbsp. of olive oil into the bottom of a preheated pan. Add a few pieces of sliced baguette to the pan, and fry until golden brown on both sides. Don't waste your fancy olive oil here, any generic brand of olive oil will do.
(5) Scoop Bruschetta onto the toasted baguette and sprinkle with a freshly grated cheese if desired.

Everything you need...

When chopping basil, stack all the leaves into a pile
and roll them into a little parcel. Slice your roll with a
sharp knife, as though you were slicing a loaf of bread.

*This Recipe will make enough for two generous servings. Nutritional value does not include toasted French Baguette.

Nutritional Value
(Per Serving)

Calories 66                       
Total Fat 3.9                             Carbohydrates 7g
Saturated Fat 0g                        Fiber 1.3g
Cholesterol 0mg                       Sugars 3.6g
Sodium 6.5mg                           Protein 1.3g


Thursday, March 24, 2011

An After School Snack, Parents can also Enjoy.

    Since my husband decided to skip the country again, I am left here to cook for myself. My little guy has a limited palate consisting mostly of PB & J or Macaroni and Cheese. But he won't turn down Guacamole when given to him. Because of this I try to keep avocados in the house so  I can whip up a batch when the occasion arises. So once school was over today and snack time rolled around, out came the Guacamole.
    The main ingredient in Guacamole is avocado. Some people love them and others hate them. I happen to love them. They are good for your skin and hair, help to lower cholesterol are higher in potassium than a banana etc. etc. But health benefit's aside, they're delicious. You can't go wrong with an avocado.
    My most favourite way to eat avocado is in Guacamole. You can eat it on a tortilla chip, with some crisp veggie sticks or simply on it's own. But it doesn't have a very long shelf life, so you want to make it shortly before serving. If you do need to store it for an extended period of time, do so in a tall, thin container. This way there will be limited surface area for any oxidation to take place. And once it does occur, you can just scrape off the top layer and the rest will have remained a beautiful green color. However, I don't recommend storing it any longer than 3 days. Any longer and the quality will quickly go down hill.
    There are about a thousand ways to make Guacamole. Most preparations have two things in common. First and most importantly is, well, Avocado. It is Guacamole after all. And second, lime juice. This is to slow down the oxidation and add flavor. But of all the different ways to prepare Guacamole, I prefer my recipe. Maybe one day I'll try switching it up, but for now I'm gonna stick to what works.

Guacamole:
Guacamole with tortilla chips and veggies
for dipping.


Ingredients:

2 avocados
1/4 cup red onion, diced
1/4 cup red pepper, diced
1/4 cup fresh cilantro, chopped
1 tsp. jalapeno chopped, seeded and de-veined (more or less depending on how spicy you like your food)
1/2 tsp. salt
2 Tbsp. fresh lime juice

Directions:

(1) Remove skin and pit from avocado.
(2) Mash avocado, leaving some lumps for texture.
(3) Add the rest of the ingredients, and stir to combine.
(4) Transfer to serving dish.

All the fixin's
Cut the avocado lengthwise in half
around the pit. Carefully and firmly,
strike the exposed pit with the sharp
edge of the knife. While grasping the
avocado, twist the knife to loosen
and remove the pit.
Do not over mash. Leave some body
to the avocado.


*This recipes yields 8 Tbsp. of Guacamole

Nutritional Value
(Per 2 Tbsp. Serving)

Calories 84              
Total Fat 7.4g                    Fiber 3.5 g
Saturated Fat 1.1g             Sugars 0.7 g
Cholestorol 0mg                Protein 1.1 g
Sodium 243.9 mg              Carbohydrates 5.3 g

Wednesday, March 23, 2011

Get your sleep and still eat a healthy, hearty breakfast...

    Last night before bed I made breakfast. I pulled out my slow cooker, added a few ingredients, and turned it on. When I woke up this morning, my breakfast was hot and waiting for me.
    A while ago, while watching "Good Eats", a Food Network show, I came across the concept of cooking Steel Cut Oats in the slow cooker. For those of you who aren't sure what steel cut oats are, they are simply whole grain groats (the inner portion of the oat kernel) which have been cut into only two or three pieces by steel rather than being rolled out, like the very popular and commonly used Instant or Rolled Oats. They are golden in color and resemble small pieces.
    Steel-cut oats are also known as coarse-cut oats, pinhead oats, or Irish oats. This form of oat usually takes quite a while to prepare, typically 15–30 minutes to simmer. The flavor of the cooked oats is described as being nuttier than other types of oats, are chewier in texture, but because of their minimal processing, are much healthier for you.
    You can find these in the Natural Foods section of your grocery store, usually in the same aisle as the nuts and all the baking mixes. The package seems quite small for the price, yielding only 3 1/2 cups of the raw oats. But unlike Rolled Oats, these cook up sort of like rice, tripling in size once cooked. They generally cost about $4.99 per bag of Organic oats and $3.50 for the conventional. So they are very affordable.
    When preparing the oats as per the recipe I have listed below, you will get six, 1/2 cup portions.
That's 21 portions per package, at $0.24 per portion. I can't think of any other breakfast meal that offers as big a bang for my buck.
    The Oats, when eaten plain, can taste pretty boring. So I add a few things to brighten up the flavor. The possibilities are endless. Currently I add flax seed and psyllium husks, for added fiber. Some walnuts I had previously candied with maple syrup, and a drizzling of maple syrup over top.
    You could also add such ingredients as dried fruit, fresh fruit, honey, and any type of nut while still maintaining the overall goal, which is to eat a healthful breakfast.
    So here is how I make it:

Slow Cooker Steel Cut Oats
 Adapted from Alton Brown


Slow Cooked Steel Cut Oats
w/ Candied Walnuts
 
Ingredients:

1 cup steel cut oats
4 cups water
1/2 cup milk (I use Rice Milk and it still works out great)
Assorted toppings 

Directions:

(1) In a slow cooker, combine first 3 ingredients  and set to low heat.
(2) Cover and let cook for 8 to 9 hours.
(3) Stir and remove to serving bowls. This method works best if started before you go to bed. This way your oatmeal will be finished by morning.

*    Because of the size of my small family, we can never finish the whole pot. I scoop out 1/2 cup portions into individual containers and use as needed. The cooked oats will keep up to a week in the fridge in a sealed container.
     The consistency will change a little once cooled. I just add a small amount of boiling water and stir to bring the oats back to their original consistency.  Then heat in the microwave and your all set.


Pre-portioned and ready to
go for the rest of the week


This is the specific brand I buy.
"Bob's Red Mill" Organic Old Fashioned
Steel Cut Oats.


Monday, March 21, 2011

Cabane a Sucre Weekend

    This past week we were away visiting family in Quebec. Since it was March Break, we thought it would be fun to take advantage of our surroundings and participate in an authentic Cabane a Sucre. It was a fabulous time. We ate an authentic Sugar Shack meal with all the fixin's, learned to make maple syrup and even rode in a horse drawn carriage. It is safe to say that we are all maple syrup'ed out.
    When I was deciding what I would post today, I thought I would stay in theme with the past weeks festivities. Of all the delicious things we got to eat, what I enjoyed the most was the Tarte au Sucre/ Sugar Pie. So I figured I would share that with you.

Tarte au Sucre

Delicious Sugar Pie
Ingredients:

1 pie crust, unbaked (see below for recipe)
6 tbsp. all purpose flour 
2 cups packed brown sugar (or half brown sugar, half maple sugar if you have/ can afford it) 
1 1/2 cups low fat evaporated milk
4 tbsp. butter
1/2 tsp. salt 
1 tsp. vanilla or maple extract 

Directions:

(1) Preheat oven to 400F
(2) In a saucepan, combine flour and sugar and mix.
(3) Stir in milk slowly to avoid lumps, then add butter and salt.
(4) Cook, stirring constantly, until mixture comes to a boil.
(5) Remove from heat, add vanilla or maple extract.
(6) Pour into an unbaked pie shell.
(7) Bake at 400F for 5 minutes.
(8) Reduce heat to 350F and continue baking for 25 minutes.
(9) Remove from oven and let cool in a rack.

Pie Crust

1 1/4 cups all-purpose flour
1/4 tsp. salt
1/2 cup butter, chilled and diced
1/4 cup ice water

Directions:

(1) In a large bowl, combine flour and salt. Cut in butter until mixture resembles coarse crumbs. Stir in water, a tablespoon at a time, until mixture forms a ball. Wrap in plastic and refrigerate for 4 hours or overnight.
(2) Roll dough out to fit a 9 inch pie plate. Place crust in pie plate or ceramic pie dish. Press the dough evenly into the bottom and sides of the pie plate.

Saturday, March 12, 2011

Curry-ously Delicious

    A while ago I found the most delicious looking recipe for a Red Thai Duck Curry on a blog I frequently follow (The Pioneer Woman). I got around to making it for the first time tonight, and it did not disappoint. It had the perfect balance of sweet, salty, sour and spicy  very spicy, that you expect to get from eating Thai food. If you are a fan of curry at all, you must try this.
    The recipe calls for a Red Curry Paste. Coincidentally I had hunted down all the ingredients to make this myself on a recent trip to Montreal. Once I made it, I portioned it out and froze it for later use. It kept well, and I used it in tonight's recipe. You can purchase red curry paste already made in the Asian aisle of your supermarket, but the flavor nuances are lack luster in comparison to the homemade product.
    I had also found some beautiful looking duck breasts on the same trip, and couldn't pass on the opportunity to give them a try as well. This recipe originally suggested "pan frying" the breast until cooked. I decided to sear and reduce the fat on top of the breast until it was nothing but a delicious crust (Draining the fat as needed). I then flipped the breast over and transferred the entire oven proof pan to a preheated oven to finish cooking. I cooked the breast to a moist medium well, and let it rest until I was ready to use it on the curry.
   Typically, Thai style curry dishes are paired with an aromatic rice like Basmati or Jasmine. But in my quest to cut calories from an already calorie ridden dish, I replaced the rice with a cauliflower "rice". It added an unexpected "creamy butteriness", that I really enjoyed. As a lover of all rices, I was thinking I would regret my decision to subsitute. But I did not. This recipe has made my top 10 favorites list. I can't wait for Lunch to eat my leftover's.
 

Red Thai Duck Curry

Red Thai Duck Curry on Cauliflower Rice
Ingredients:

1 whole boneless duck breasts, fat on if desired
2 tbsps. olive oil
3 cloves garlic, minced
3 tbsps. red curry paste (store bought or homemade)
1 14oz can full fat coconut milk
1 cups hot water
2 tbsps. fish sauce
1-2 tbsps. fresh ginger, grated
2 tbsps. olive oil (additional)
½ whole red onion, sliced
1 whole green or red bell pepper, cored and sliced
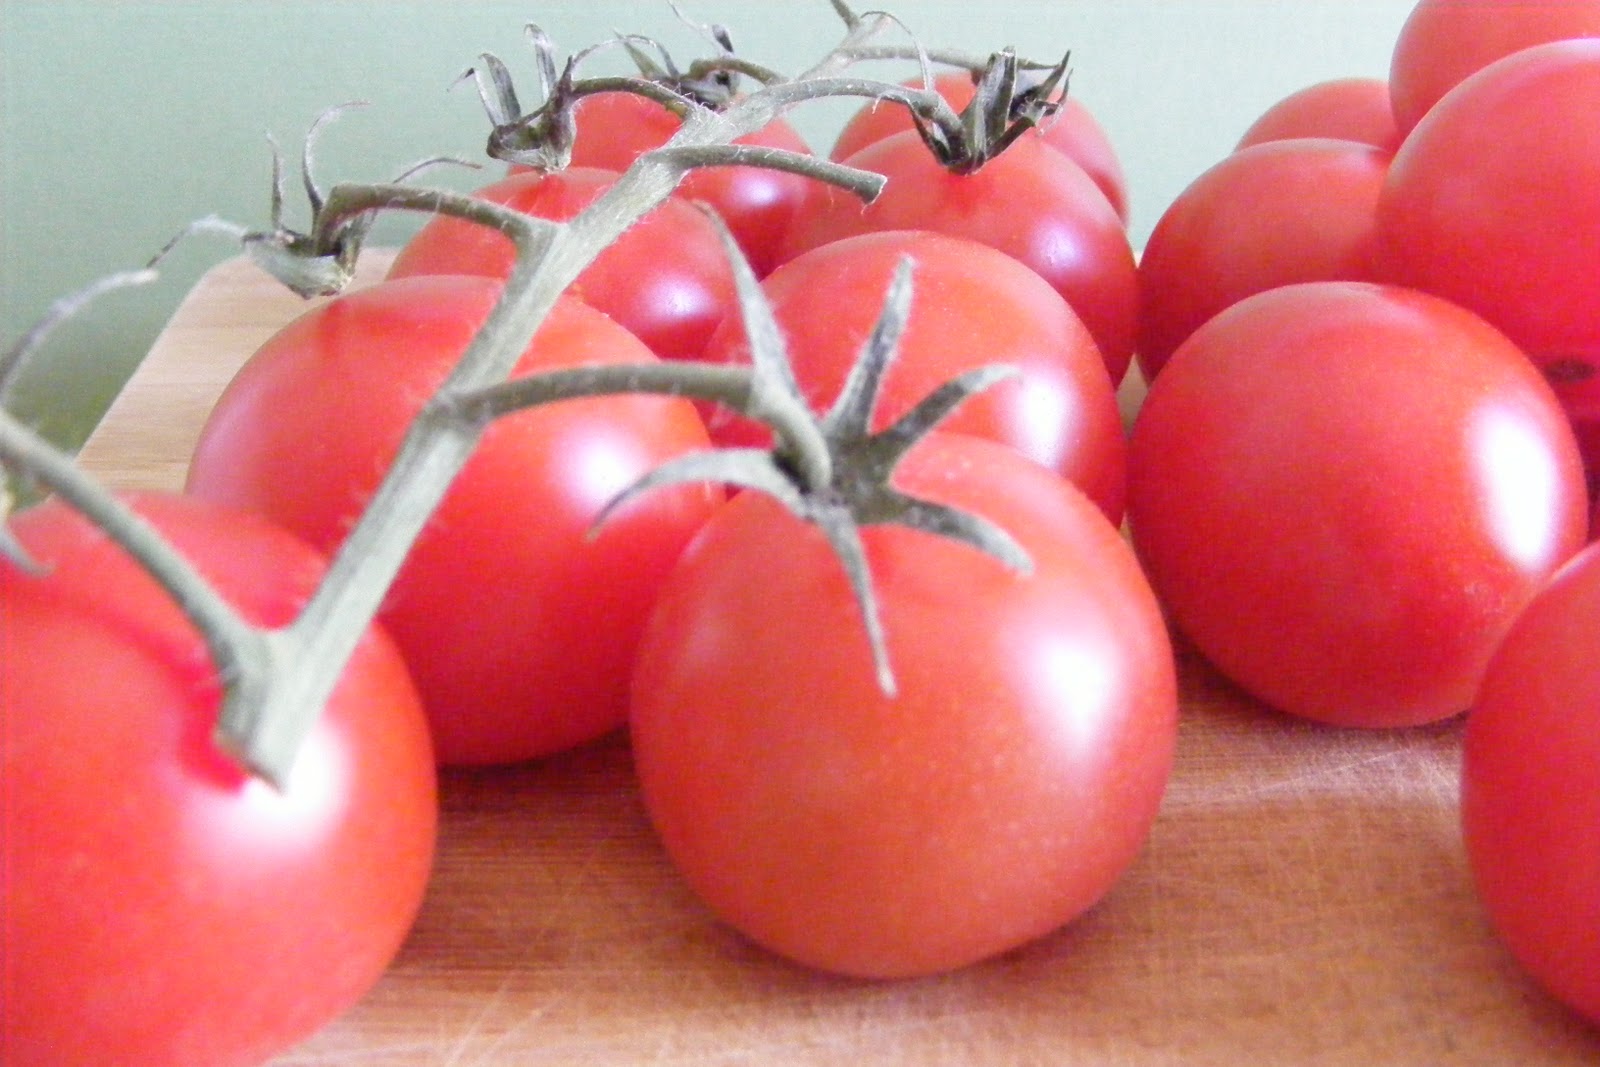
1 cup grape tomatoes (I omitted these)
2 cups fresh pineapple, cut into chunks
1/4 cup fresh cilantro, chopped (the original recipe used basil)
Jasmine rice cooked (or you can use cauliflower "rice")

Directions:

(1) Preheat oven to 350 degrees F.
(2) Wash and dry duck breast. Score the fat on the breast.


(3) Place in a preheated (oven safe) pan, that has been set over medium high heat, fat side down. Cook for several minutes, draining the fat as needed. You will know the fat is finished searing, when it has become crispy and golden brown in color. (Don’t worry about cooking the duck at this point. You just want to give the skin some great color. You will finish cooking in the oven).
(4) When the duck has rendered it's fat and has reached the desired crispness, drain off the remaining fat. Flip the duck breast so it is fat side up. Transfer to the oven for 8- 10 minutes. (8 minutes for med well, 10 minutes for well done).
(5) Once the duck breast has reached it's desired doneness, remove from the oven and let rest.

Let tht duck breast rest for a
few minutes.

Thinly slice the duck breast.

(6) Now, start creating the curry. In a clean saucepan, heat 1 tbsp. of  olive oil. Go ahead and add the minced garlic to the pan. Add red curry paste to the pan and stir. Cook paste for several minutes to release the flavors.


(7) Pour in the coconut milk, hot water, fish sauce, and minced ginger. Stir and allow to cook over low heat for 10 to 15 minutes while you prepare the other ingredients. Reduce until it reaches a sauce like consistency.

(8) In a second pan, heat the remaining oil over medium high heat. Add sliced onions and bell pepper and cook for a few minutes, until vegetables begin to soften. About 3 to 4 minutes.


(9) Add pineapple and cherry tomatoes. Stir and cook for 2 minutes.
(10) Taste the curry sauce, which should be thickened by now. Add more spice if needed.

The sauce is thickened when a ribbon
appears after you scrape the bottom of
your pan with a spatula.
(11) Pour vegetables into the curry sauce. Stir to combine. Set heat to medium low, to keep warm. (Add a little hot water if it seems too thick, or allow to bubble longer if it needs more thickening). Remove from heat and allow to sit for 5 minutes.


(12) At the last minute, stir in the chopped cilantro. Serve curry mixture immediately over a hot bed of rice.

*Yields 2 Large Servings

Friday, March 11, 2011

When Life Gives You Lemons......Don't Waste Them

    I am a fresh citrus buyer. Some people make do with the Real Lemon and Real Lime juices, but I like being able to cook with the juice and the zest. I find it to be a very calorie conscious way of adding flavor to my food. However, occasionally I over estimate how many I need for the week and end up with unused citrus fruit. I usually keep them around for a while. You know, until they become borderline unusable. But do I toss them in the trash when they still haven't been used? Not a chance. Limes are $0.60 each, and lemons...don't even get me started on the lemons.
    I have found a bunch of ways to make use of citrus when they are fast approaching their best by date. But the technique I find that works best for my household is this; simply use a carrot peeler and remove the zest. Place it in a freezer proof container that has a tight sealing lid. And freeze. Yup. It's that simple. You could probably use a micro planer or a zester to do this, but I feel that the larger the surface area you leave on the zest, the less likely it is to freezer burn or for the natural oils to dissipate. When you are in need of citrus zest, just grab the amount you need from the freezer and chop it up.
    Now for the juice. All you need to do here is remove the juice from the pre-zested lemons, and pour the juice into an ice cube tray. Once the juice has frozen, transfer the cubes to a resealable plastic bag. Each cube usually yields about 1 Tbsp. of juice, so you can use it in recipes as needed.

Thursday, March 10, 2011

Finger Lickin' Good


    During my infinite quest to find fun activities for my little guy, I came across Pudding Paint. The idea instantly struck me as a winner. The moment I was in need of a new time waster, I pulled it out. And I was right. This little beauty of an activity, kept the wee one distracted for a whole hour. That NEVER happens. My child has many remarkable qualities, but being able to focus on a task is not one of them. I often find myself, taking time to prepare an activity for him, and he has become bored with it before it has even started. It can be exhausting to say the least.
    Anyhow, like most children's activities it doesn't require you to spend a lot of money, and the supplies needed are generally found around the house. Once prepared, the pudding can safely last in the fridge for at least three days. If you are planning on having more than one "Pudding Paint Day", divide the product into separate containers. You don't want to reuse it after little hands have been in there playing with it.

Pudding Paint

Materials Needed

Materials

  • 1 package of vanilla pudding, prepared according to package instructions (It usually calls for milk but I used water instead. The end result will just be a little more watery, and this way you won't waste your milk)
  • food coloring, an assortment of colors (I used red, blue and yellow. You can pretty much combine these three colors to make any color you want)
  • bowls (1 for each color of pudding paint you want to create)
  • paper  
  • rotary mixer or stand mixer to prepare pudding

Directions

1) Prepare pudding according to package instructions and place in refrigerator to chill for at least 5 minutes.
2) Divide pudding as desired
3) Mix food coloring into the separated pudding, until it has been well incorporated.
4) Create a safe area for painting, away from anything the might get ruined in the event of an accidental spill.

*I managed to find a large roll of white paper that I use for activities such as this one. I roll it out and tape it to the floor. That way if anything spills, I can just pull out the mop and bucket

Artist at work

Wednesday, March 9, 2011

Gyoza, Dumplings, Potstickers....What ever you wanna call them

    I have been seeing Chinese Gyoza, or Chinese Potstickers everywhere. I love Asian food, and I  couldn't resist the temptation any longer. I went to the store, picked up all the ingredients, and set to work on a pretty labor intensive mission to cure my craving.
    Although these little creations can be gobbled up in a matter of seconds, they are very time consuming to create. I had a lot of fun making them, but had I known how many my recipe made, I definitely would have cut the quantities in half. So if you decide to make these for yourself, keep that in mind. However, I'm not complaining. I have gyoza up the wazoo. Now every time I feel like Asian food, I have the perfect little appetizer to go with it.
    They keep well, and can be stored for upwards to six months in a freezer (If stored properly). They can be cooked from frozen. So no thawing involved. How convenient is that? The premade, store bought version cannot even compare to how delicious these are.

Pork and Scallion Gyoza (Potstickers)

Fried, then steamed Pork and Scallion Gyoza with Thai Chili
dipping sauce.

Ingredients:

1 head Napa cabbage (about 6 cups shredded)
2 tsp. salt
1 1/2 lbs. ground pork
2 tbsp. corn starch
8 green onions, minced (whites and greens)
3 tbsp. soy sauce
1 1/2 inch piece ginger, grated
3 garlic cloves, grated
4 oz. silken tofu
800 grams of potsticker or wonton wrappers
1 tbsp. peanut oil, for frying

Directions:

1) Prepare the filling by thinly shredding the cabbage.


2)Place into a colander and sprinkle with 2 teaspoons salt. Toss with your fingers to coat all of the cabbage with the salt. Allow to sit for 20 minutes to draw out the excess water.

Add the salt.
After you allow the salt to work it's magic,
the cabbage will reduce in volume by nearly half.
3) While it sits, continue preparing the filling. In a large bowl add the ground pork, corn starch, minced green onion and soy sauce. Grate in the ginger and garlic. A well prepared filling should have finely chopped ingredients that are uniform in size.
4) Add the silken tofu. This can be found in the natural foods section of your grocery store, in the dry food aisle. The silken tofu adds an extra bit of moisture to the filling and you won’t even know it’s in there. Use a spoon to blend everything together. Break up all of the meat so it’s almost like a paste.
(5) Place the cabbage into a clean kitchen towel and twist up the sides, squeezing the cabbage of its excess water. You will be shocked how much water comes out. Remove it from the cloth, and give it another run through with a knife. Add it to the pork mixture. Stir to combine. Refrigerate until ready for use. Some people like to precook their filling, but it isn't necessary.


5) You can buy round potsticker dumpling skins in the refrigerated grocery section of some grocery stores, but the square wonton wrappers are available pretty much anywhere. So you'll have to use what you can find or make your own from scratch. I opted to save making my own for another day, and used the square wonton wrappers. But since I wanted to fold them using the round wrapper technique, I cut them into rounds using the rim of a glass.
6) Once you are ready to start folding the potstickers, create a work station. Have everything you need within arms reach. You will need a container to place the folded dumplings (covered with a damp dish towel so the wrappers don't dry out), and another damp cloth to cover the unused wonton wrappers.

7) Lay out two or three wrappers at a time, and place about 1/2 tbsp. of the mixture in the middle of each wrapper. The wrappers dry out quite quickly, so it is important to work fast.


8) Fold as desired. There are a few ways you can do this, but it would be impossible to explain. I think it would be best to take a Youtube tutorial if you want them to look dainty.


Yields 120 potstickers


    Once you are ready to cook them up. Heat a tbsp. or so of peanut oil in a pan. Fry them until the bottoms have browned. This will just take a moment. Add about a 1/4 cup of water and/or chicken stock to the pan. Immediately cover with a lid. From here you will be steaming them cooked. Once the wrappers have become translucent and the filling appears to be cooked, (5 minutes or so. 8-10 if cooking from frozen), transfer them to a serving dish. If your pan has become dry, and the potstickers still haven't finished cooking, just add a little more liquid and put the lid back on. These can be paired with a multitude of dipping sauces, or you can eat them plain. Enjoy!