Friday, May 27, 2011

Minimal Effort, Maximum Flavor

   Finally some nice weather...
   There is something about sunshine that instantly puts me into a good mood. Since my hubby has been home for the past week or so, we've been busy doing the family thing. Because of the nice weather we've been having, we instantly gravitate to outdoor activities. Playing at the park, doing yard work etc...
    I hate coming inside to cook on days like this, so BBQing seems like the only option. Early in the morning I loaded my slow cooker up with some Baby Back Pork Ribs, along with a hefty portion of my Homemade Orange-Chipotle BBQ Sauce, and let them cook all day. When supper time came around, all that was left to do was to toss them on the grill for some authentic BBQ flavor. Mmmm, Mmmm. Minimal effort and maximum flavor.

Slow Cooker BBQ Pork Ribs:

Slow Cooker BBQ Pork Ribs
with a Homemade Orange-Chipotle BBQ Sauce
Ingredients:

1/2 Rack of Ribs per person
About 1/2 cup of your favourite BBQ sauce per portion of ribs, or try my
Homemade Orange Chipotle BBQ Sauce
salt and pepper to taste

Directions:

(1) Cut the ribs into desired portion sizes and place them into a slow cooker. Season with salt and pepper.
(2) Add enough BBQ sauce to cover the ribs.

(3) Cover with the lid and cook on low for 8 hours, or until the meat begins to fall away from the bone.
(4) Once cooked, remove the ribs from the slow cooker and chill in the fridge for about an hour. Until the meat begins to firm up again.
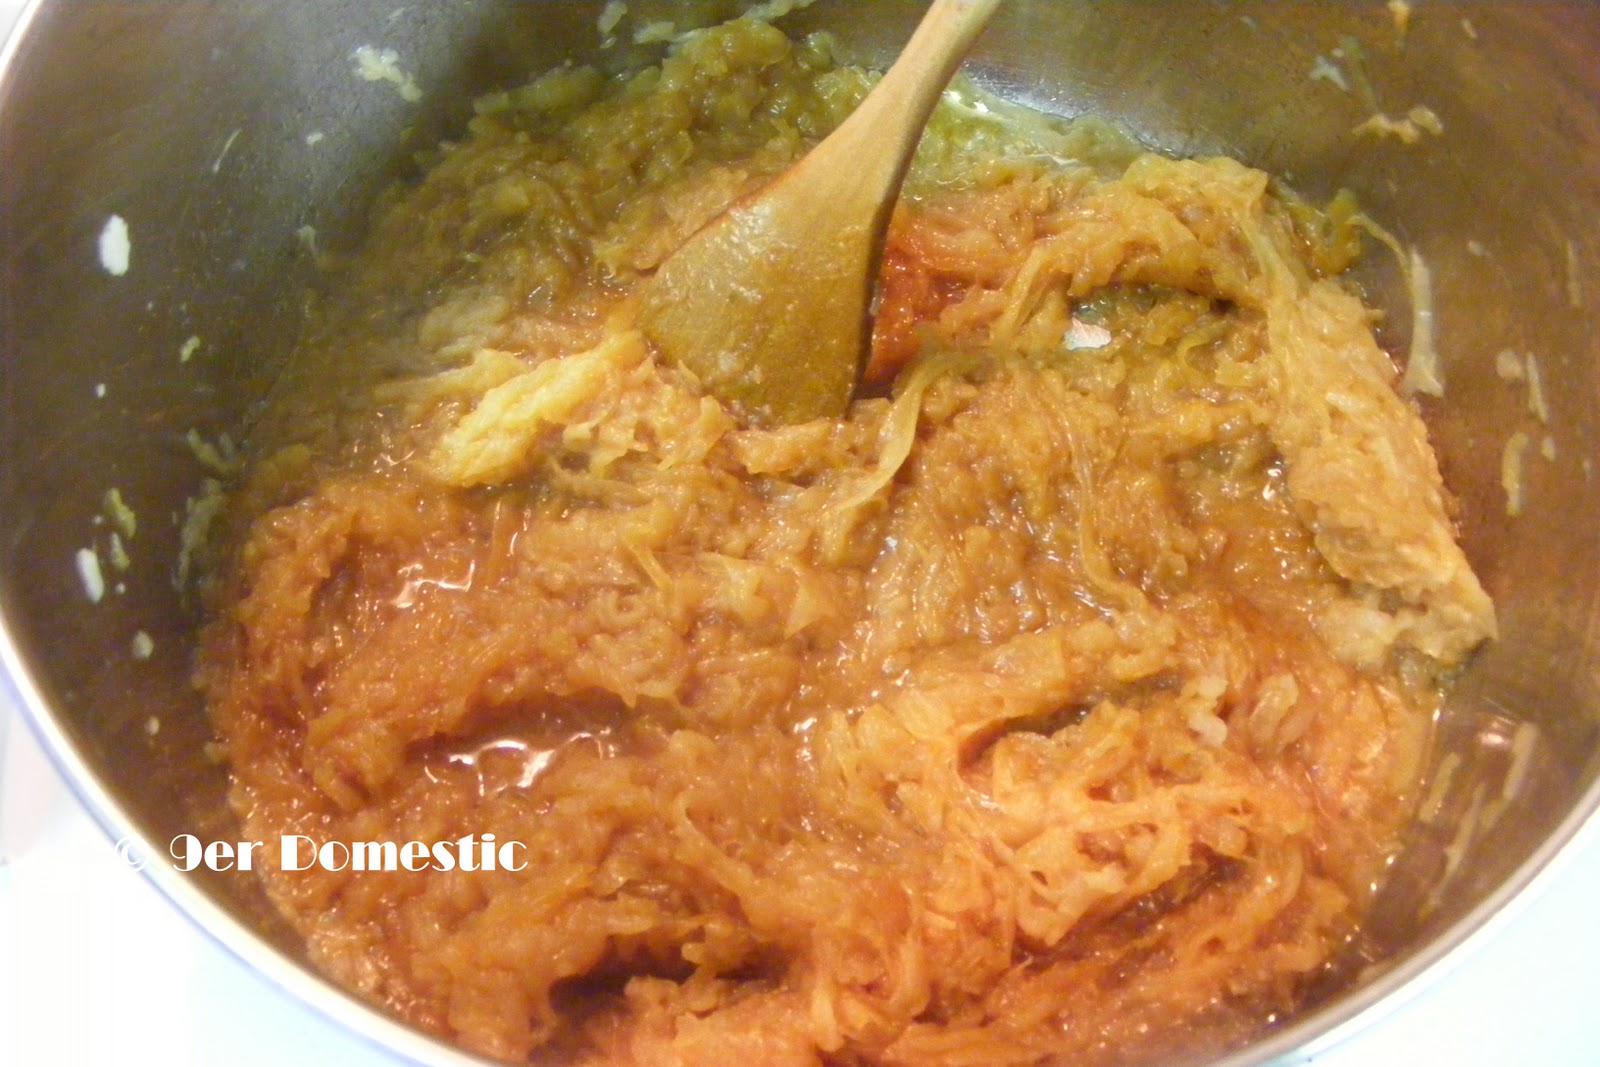
(5) Pour the BBQ sauce from the slow cooker into a medium size sauce pan. Drain any solids, as well as remove any fat that rises to the surface while simmering. 
(6) Simmer over medium heat, and reduce until it forms a thick sauce again. About 20 minutes, depending on the amount.
(7) Preheat the BBQ to about 350 degrees. Add the ribs and baste with the reduced BBQ sauce.
Slow Cooked BBQ Ribs basted in a homemade
Orange-Chipotle BBQ Sauce. Served with a
healthy South Western Quinoa Salad.

Friday, May 20, 2011

Some Serious Sauce

   One of my all time favourite meals is Spaghetti and Meatballs. I had recently used up all of my "in the freezer, and ready to go" spaghetti sauce, so it was time to make some more. I took a quick scan of my freezer to see what ingredients I had, and which I needed to buy... and coincidentally I happened to have everything I needed to make this Bolognese Sauce. I don't usually change from my habitual Spaghetti and Meatballs, but I sure am glad I did. This was a great change in flavor.
    This cold, rainy weather is really allowing me to have large simmering pots of hot sauces and soups on the stove for hours on end. Once the hot weather comes....not a chance.... maybe then I will break out the slow cooker.

Spaghetti Bolognese:

Spaghetti Bolognese garnished with Pecorino
Romano and Fresh Basil.

Ingredients:
1 medium onion, diced
2 carrots, diced
2 stalks celery, diced
4 cloves garlic, roughly chopped
2 tbsps. olive oil
1/2 lb. ground beef
1/2 lb. Italian sausage (I like to use the hot sausage)
2 tbsps. olive oil
1/4 1b. pancetta, diced (bacon will work as well)
1 cup red wine (or 1 tablespoon balsamic vinegar)
1 (28 ounce) can diced tomatoes
1 (5 ounce) can tomato paste
1 pecorino romano rind (optional)
2 bay leaves
1 tsp. oregano
salt and pepper to taste
1 lb. spaghetti
1 handful basil, chopped
1/4 cup pecorino romano, grated

Directions:
1) Dice the onion, carrot, celery, and garlic.
2) Cook the ground beef and sausage in a large saucepan over medium-high heat until brown all over. Drain the fat and set aside.
3) Heat the oil in the same pan on medium high heat.
4) Add the pancetta and saute until it starts to get crispy.
5) Add the vegetables and saute until they begin to caramelize.
6) Add the beef, wine, diced tomatoes, tomato paste, pecorino romano rind, bay leaves, oregano, salt and pepper and bring to a boil.
7) Reduce the heat to medium-low and simmer, covered for 1-3 hours. The longer then better.
8) Cook the spaghetti as directed on the package.
9) Toss the spaghetti and the sauce or serve the sauce on the spaghetti and garnish with basil and grated pecorino romano.

You may also like:
Chicken Parmagiana


Wednesday, May 18, 2011

Rainy Weather Food...

    With all the stinking rain we have been having, I was really beginning to feel like a nice, hot bowl of soup. I always seem to crave comfort food when the weather is gloomy.
    French Onion Soup, despite the lengthy prep time, is pretty simple to make. Once you render down the onions it really comes together quite quickly. Just throw all the ingredients into the pot with the onions, and let it simmer a short while.
   Since this recipe yields 6 servings and there is just little old me to eat it, I portioned out the rest of the soup into smaller containers. This way when ever a soup craving arises, I can just pull a container of soup out of the freezer. I just add the bread and the cheeses right before I am ready to eat it.

Baked French Onion Soup:
Loosely Adapted from a recipe from the Blog, Closet Cooking


Ingredients:
1/4 cup butter
4 pounds onions, thinly sliced
1/2 cup red wine (or beef or vegetable broth + 1 tablespoon balsamic vinegar)
3 cups beef broth (or vegetable broth)
2 cups water
2 cloves garlic, chopped
1 teaspoon thyme, chopped
2 bay leaves
salt & pepper to taste
4 1/2 inch thick slices of day old bread, toasted
sliced Swiss cheese (1 slice for each bowl of soup)
1/4 cup Parmesan cheese, grated

Directions:
(1) Melt the butter in a large pot over medium-low heat.
(2) Add the onions and cook slowly at low with the lid on until golden brown and caramelized, about 3-4 hours, stirring every 15 minutes.

Before....


And finally, after 4 hours.
(3) Add the wine and deglaze the  pan.
(4) Add the broth, water, garlic, thyme, and bay leaves, salt and pepper and bring to a boil at medium heat.
(5) Reduce heat to medium-low and simmer, uncovered for 30 minutes.


(7) Preheat oven broiler.
(8) Ladle the soup into ovenproof bowls and place the bowls on a baking sheet.
(9) Place a toasted slice of bread over each bowl and top with the Parmesan and Swiss cheeses.


10. Place bowls under broiler until cheese melts, only 2-3 minutes.
bon appetit

* This recipe makes 6 portions.

Sunday, May 15, 2011

Another Delicious Sunday Morning Breakfast

    The past few weekends we have been all about the pancake. But this weekend I wanted to make an old favourite that I haven't made in quite some time; Regular old Belgian Waffles.
    I recently had the privilege of visiting Belgium, and despite the numerous waffle houses that I came across, it was never the time to sit down and eat... leaving me without the opportunity to sample some of their delicious waffles. What better way to remedy that, than to make my own once I arrived back home. Now, I am not delusional enough to believe that these are anywhere near as great as the ones I missed out on...but they will do just fine.

Classic Belgian Waffles:
Adapted from Emeril Lagasse's Recipe

Classic Belgian Waffles with Homemade
Blueberry Syrup


Ingredients:

2 cups cake flour (all purpose flour will work just fine)
2 tsp. baking powder
1/2 tsp. salt
4 Lg. eggs, separated
2 Tbsp. sugar
1/2 tsp. vanilla extract
4 Tbsp. unsalted butter (honestly, I just melt regular old margarine. It works just as good)
2 cups milk
non-stick cooking spray 

Directions:

(1) Melt the butter and let cool.
(2) Preheat the waffle iron according to manufacturers directions.
(3) In a medium bowl, sift together the flour, baking powder and salt.
(4) In a second, larger bowl, use a wooden spoon to stir together the egg yolks and the sugar until the sugar has dissolved and the yolks have turned a pale yellow.


(5) Add the vanilla extract, melted butter and milk to the egg yolks. (Be sure to let the butter cool down first, or the eggs will begin to cook.)
(6) Combine egg mixture with the flour mixture, and whisk until just blended. DO NOT over mix.
(7) In the bowl of a stand mixer, beat the egg whites until soft peaks form (About 1 minute).

Soft peaks...

(8) Using a rubber spatula, fold egg white's into the waffle batter. Again, do not over mix.


After you gently fold in the egg whites,
you get a very light and fluffy batter.

(9) Coat your waffle iron with cooking spray. Add about 1/2 cup of waffle batter. Cook until golden brown. Respray the waffle iron before cooking each waffle.


Almost finished

Mmmmm....Waffles


*This Recipe yields 8 Large Waffles.


Saturday, May 14, 2011

What we did on this rainy Saturday Afternoon...

    Everyone has their GO-TO Banana Muffin/Bread recipe that they use whenever they have a bunch of over ripe banana's laying around.  I received my Banana Muffin/ Bread recipe from my mother. These muffins are one of the first things I taught myself to make once I left the nest. They are nothing extravagant, just plain ole' Banana Chocolate Chip Muffins. But my family loves them, and when I make them they make me feel all warm and fuzzy inside.


Banana Chocolate Chip Muffins:


Ingredients:

2 cups flour
1/2 cup sugar
1/2 cup chocolate chips
1 egg
1/2 cup butter, melted
walnuts (optional)
1/4 cup shredded coconut
1 tsp. vanilla
1 tsp. baking soda
2 Tbsp. baking powder
3 Lg. banana's, mashed
pinch of salt
1/3 cup milk
1/3 cup water

Directions:

(1) Preheat the oven to 350 degrees F.
(2) Spray a muffin tray with cooking spray. (Or you can use liners if you prefer)
(3) Mash banana's in a medium sized mixing bowl. Add the egg, melted butter, sugar, vanilla, and some salt. Stir to combine.
(4) In a 2nd medium sized mixing bowl, sift together the flour, baking soda and baking powder.
(5) Combine wet ingredients with the dry ingredients.
(6) Add the water and the milk. Stir to combine. This will loosen the batter.
(7) Add the chocolate chips, coconut and walnuts if desired. Stir to combine.
(8) Spoon the batter evenly into the muffin tray.
(9) Bake for 18-20 minutes. Or until a toothpick inserted into the muffin comes out clean.

* If you would prefer to make Banana Loaf instead, just pour the batter into a loaf pan and bake for 55-60 minutes.


Recipe Yields 12 Muffins or 1 Loaf.

You may also like:
Double Chocolate Banana Loaf with Toasted Walnuts
Banana Chocolate Chip Pancakes

Wednesday, May 4, 2011

Extend-A-Herb...he he he

How to Store Fresh Herbs

   Using fresh herbs are an awesome way to add flavor to your food. They're super low in calories and depending on the herb, have a ton of health benefits. I usually buy them for a marinade or a specific dinner, and never use the entire bundle. Then I have to try and use the remainder up, by tossing them into my salads and the rest of the weeks meals. But I find that if I don't take the extra time to prepare them for the fridge, they end up becomming "soggy" and get wasted.


   In the case of Cilantro, I first remove the root. I then clean and prep the root for the freezer (I have a recipe for curry paste that calls for cilantro root, so I save it for that purpose.)
    I then place the herbs into a salad spinner filled with ice cold water, rinsing them clean of any debris that may still be hidden among the leaves. Next, I remove the herbs from the water and spin them dry.
From here I place the herbs on a piece of damp paper towel and wrap them inside. Place the bundle inside a resealable plastic bag and store in the fridge. The damp paper towel provides moisture to the herbs, keeping them from becomming soggy.


    This is by no means the only way to store herbs. However I find to be the best way I have come across. If there is a technique you find to work well, I'd love to hear about it. Someone may appreciate your technique more.

Tuesday, May 3, 2011

Craving Some Curry...

    My husband doesn't like seafood. So I thought I would make all the recipes I have been wanting to try containing seafood, while he's away. This one was on the top of the list so it was the first to be made.
It was so good, I never wanted to stop eating it. Seriously.
    A while back I made my own homemade curry paste. A Red Curry Paste, as well as a panang curry paste. They turned out marvelously. I had gotten around to using the Red Curry Paste quite sometime ago when I made Red Thai Duck Curry. It was so good, I was just itching to try the other one. This recipe was the perfect way to test it out.


Pineapple Panang Curry with Prawns:

Panang Prawn Curry with Pineapple
served with Basmati Rice

 
Ingredients:
1  Tbsp.peanut oil
1/4 cup panang curry paste
1 14oz can coconut milk
1 lime (juice)
1 Tbsp. fish sauce
1 tsp. palm sugar (grated, or white or brown sugar)
1 pound shrimp (peeled and deviened)
1 red pepper (sliced)
1/2 cup pineapple, cut into chunks
1 handful peas
1 handful cilantro
1 handful peanuts (roasted and chopped)

Directions:
(1) Heat the oil in a sauce pan.
(2) Add the panang curry paste and saute until fragrant, about a minute.

(3) Add the coconut milk, lime juice, fish sauce and sugar and simmer for 15-20 minutes to thicken.
(4) Add the shrimp,peas and red pepper. Simmer until the shrimp is cooked, about 5 minutes.
(5) Add the pineapple, cilantro, and peanuts. Remove from heat, and serve over hot Basmati Rice.

Sunday, May 1, 2011

Sunday Morning Pancakes

    Pancakes have slowly been becoming a Sunday Morning tradition in our house. As I have said in previous posts, they are a great way to cut down on weekday cooking time by making big batches, freezing them and eating them throughout the week.
    Today's pancakes were Banana Chocolate Chip. I had a few ripe banana's sitting in my freezer awaiting use, and I just didn't feel like making muffins or banana bread. It's been quiet a while since I made this specific recipe and I had forgotten how delicious they were.


Banana Chocolate Chip Pancakes:

Banana Chocolate Chip Pancakes with Sliced Banana's
and a dusting of Powdered Chocolate

Ingredients:
2 cups all purpose flour
2 Tbsp. sugar
4 tsp. baking powder
1/2 tsp. salt
2 eggs, beaten
2 cups milk
4 Tbsp. vegetable oil
1 tsp. vanilla
2 Tbsp. shredded coconut, optional
1/4 cup chocolate chips
4 ripe banana's, mashed

Directions:
(1) In a medium sized bowl combine flour, sugar, baking powder and salt.
(2) In a separate bowl, mix together eggs, milk, vegetable oil, vanilla, and mashed banana's
(3) Stir flour mixture into banana mixture (the batter will be slightly lumpy).
(4) Mix in the coconut and chocolate chips.
(5) Spray a large non-stick pan or griddle with cooking spray. Heat over medium high heat.
(6) Use 1/4 cup of the batter for each pancake. Pour out onto the griddle. Once bubbles start to appear in the tops of the pancakes, flip and continue cooking.

Bubbles are starting to appear.
(7) Serve hot with warm maple syrup.


*Recipe makes 16-18 Pancakes.

If you like this recipe, you may also like:
Apple Cinnamon Pancakes with Homemade Cinnamon Syrup
Classic Buttermilk Pancakes
White Chocolate Macadamia Nut Pancakes